

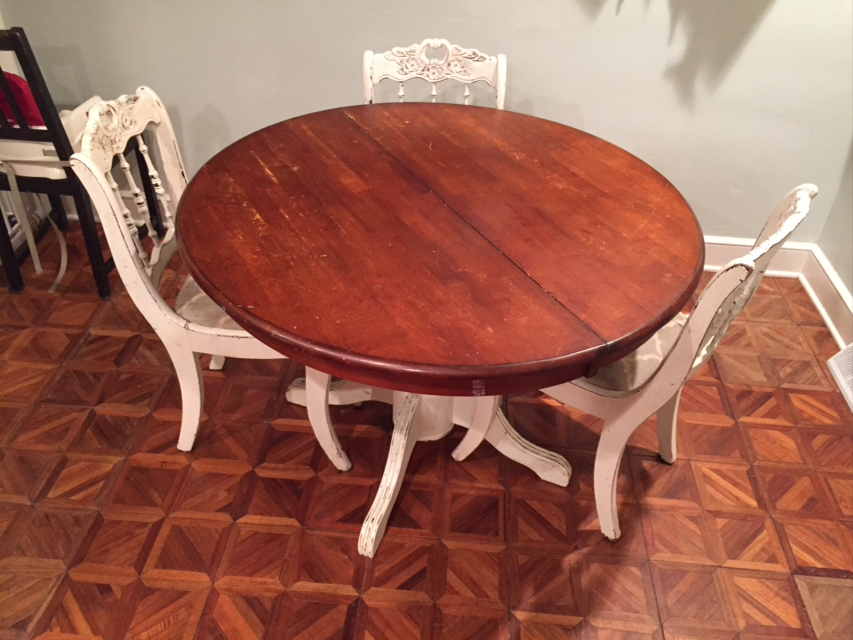
We totally lucked out and got a table and four chairs from my brother and sister-in-law (read all about it here!). It's the perfect size/shape/color to go in our kitchen. Both the chairs and table needed some TLC, which I was especially excited about because I love fixing up furniture (or at least I tell myself I do before I start fixing it up).
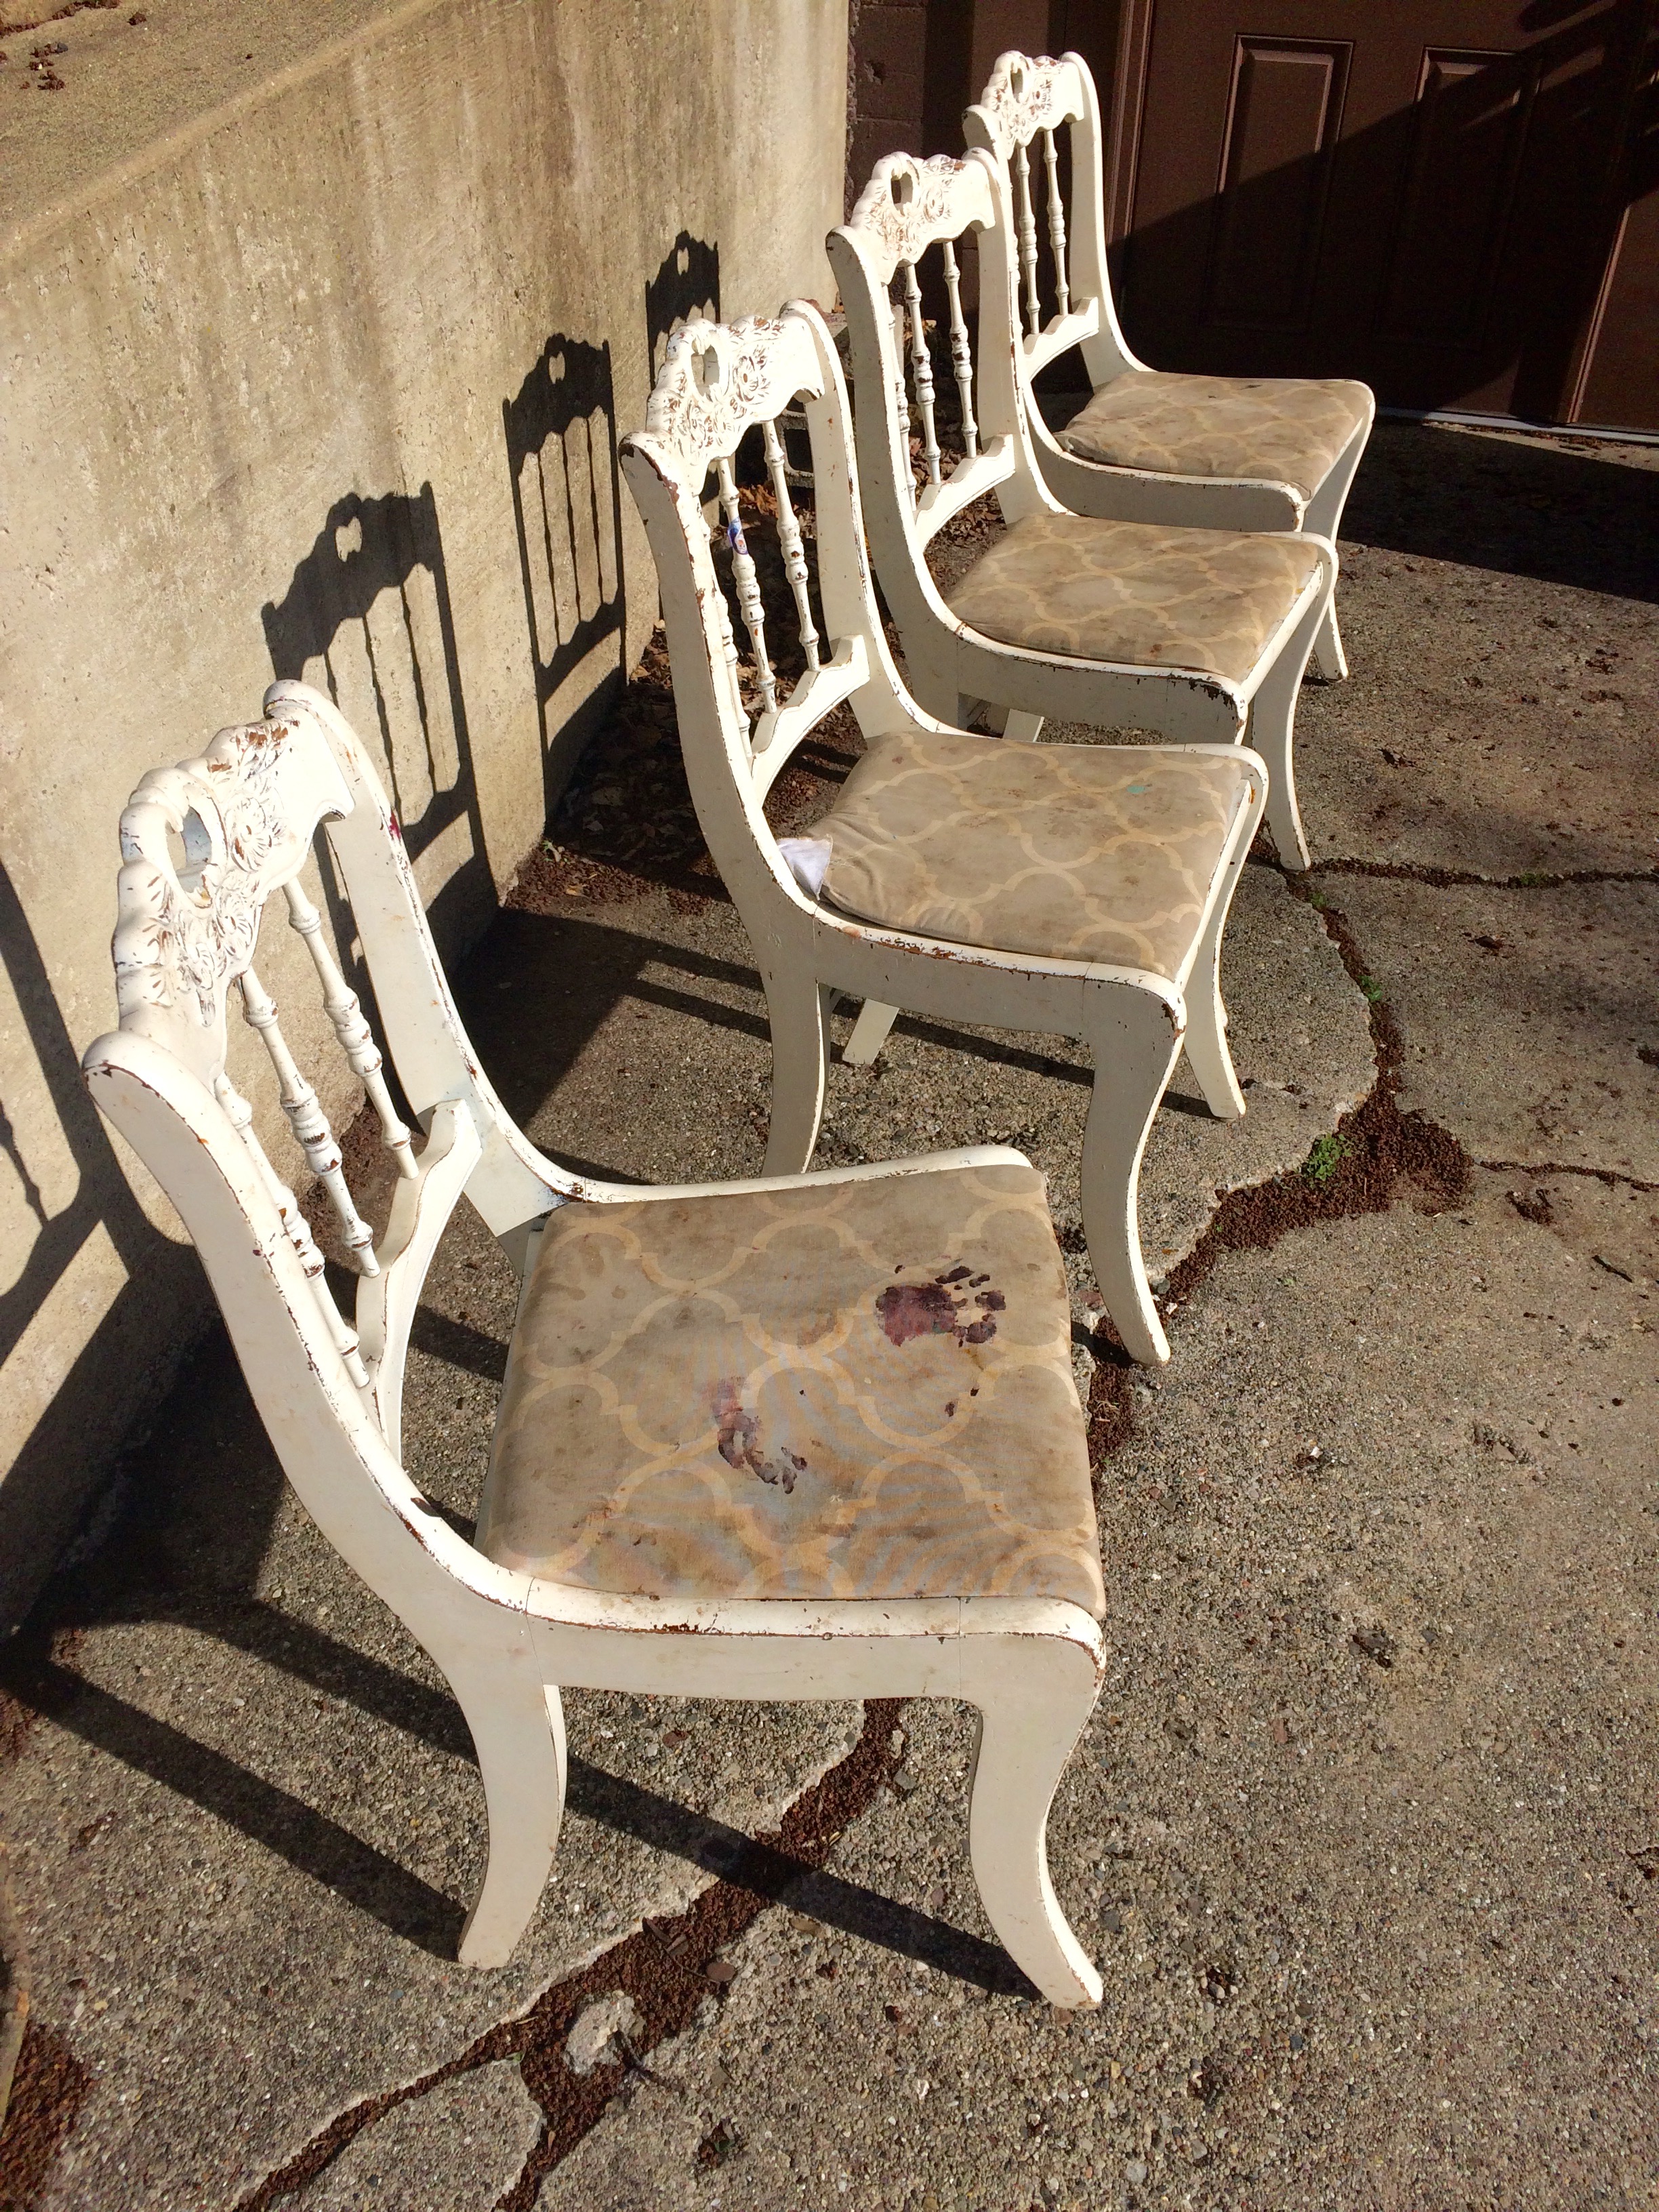
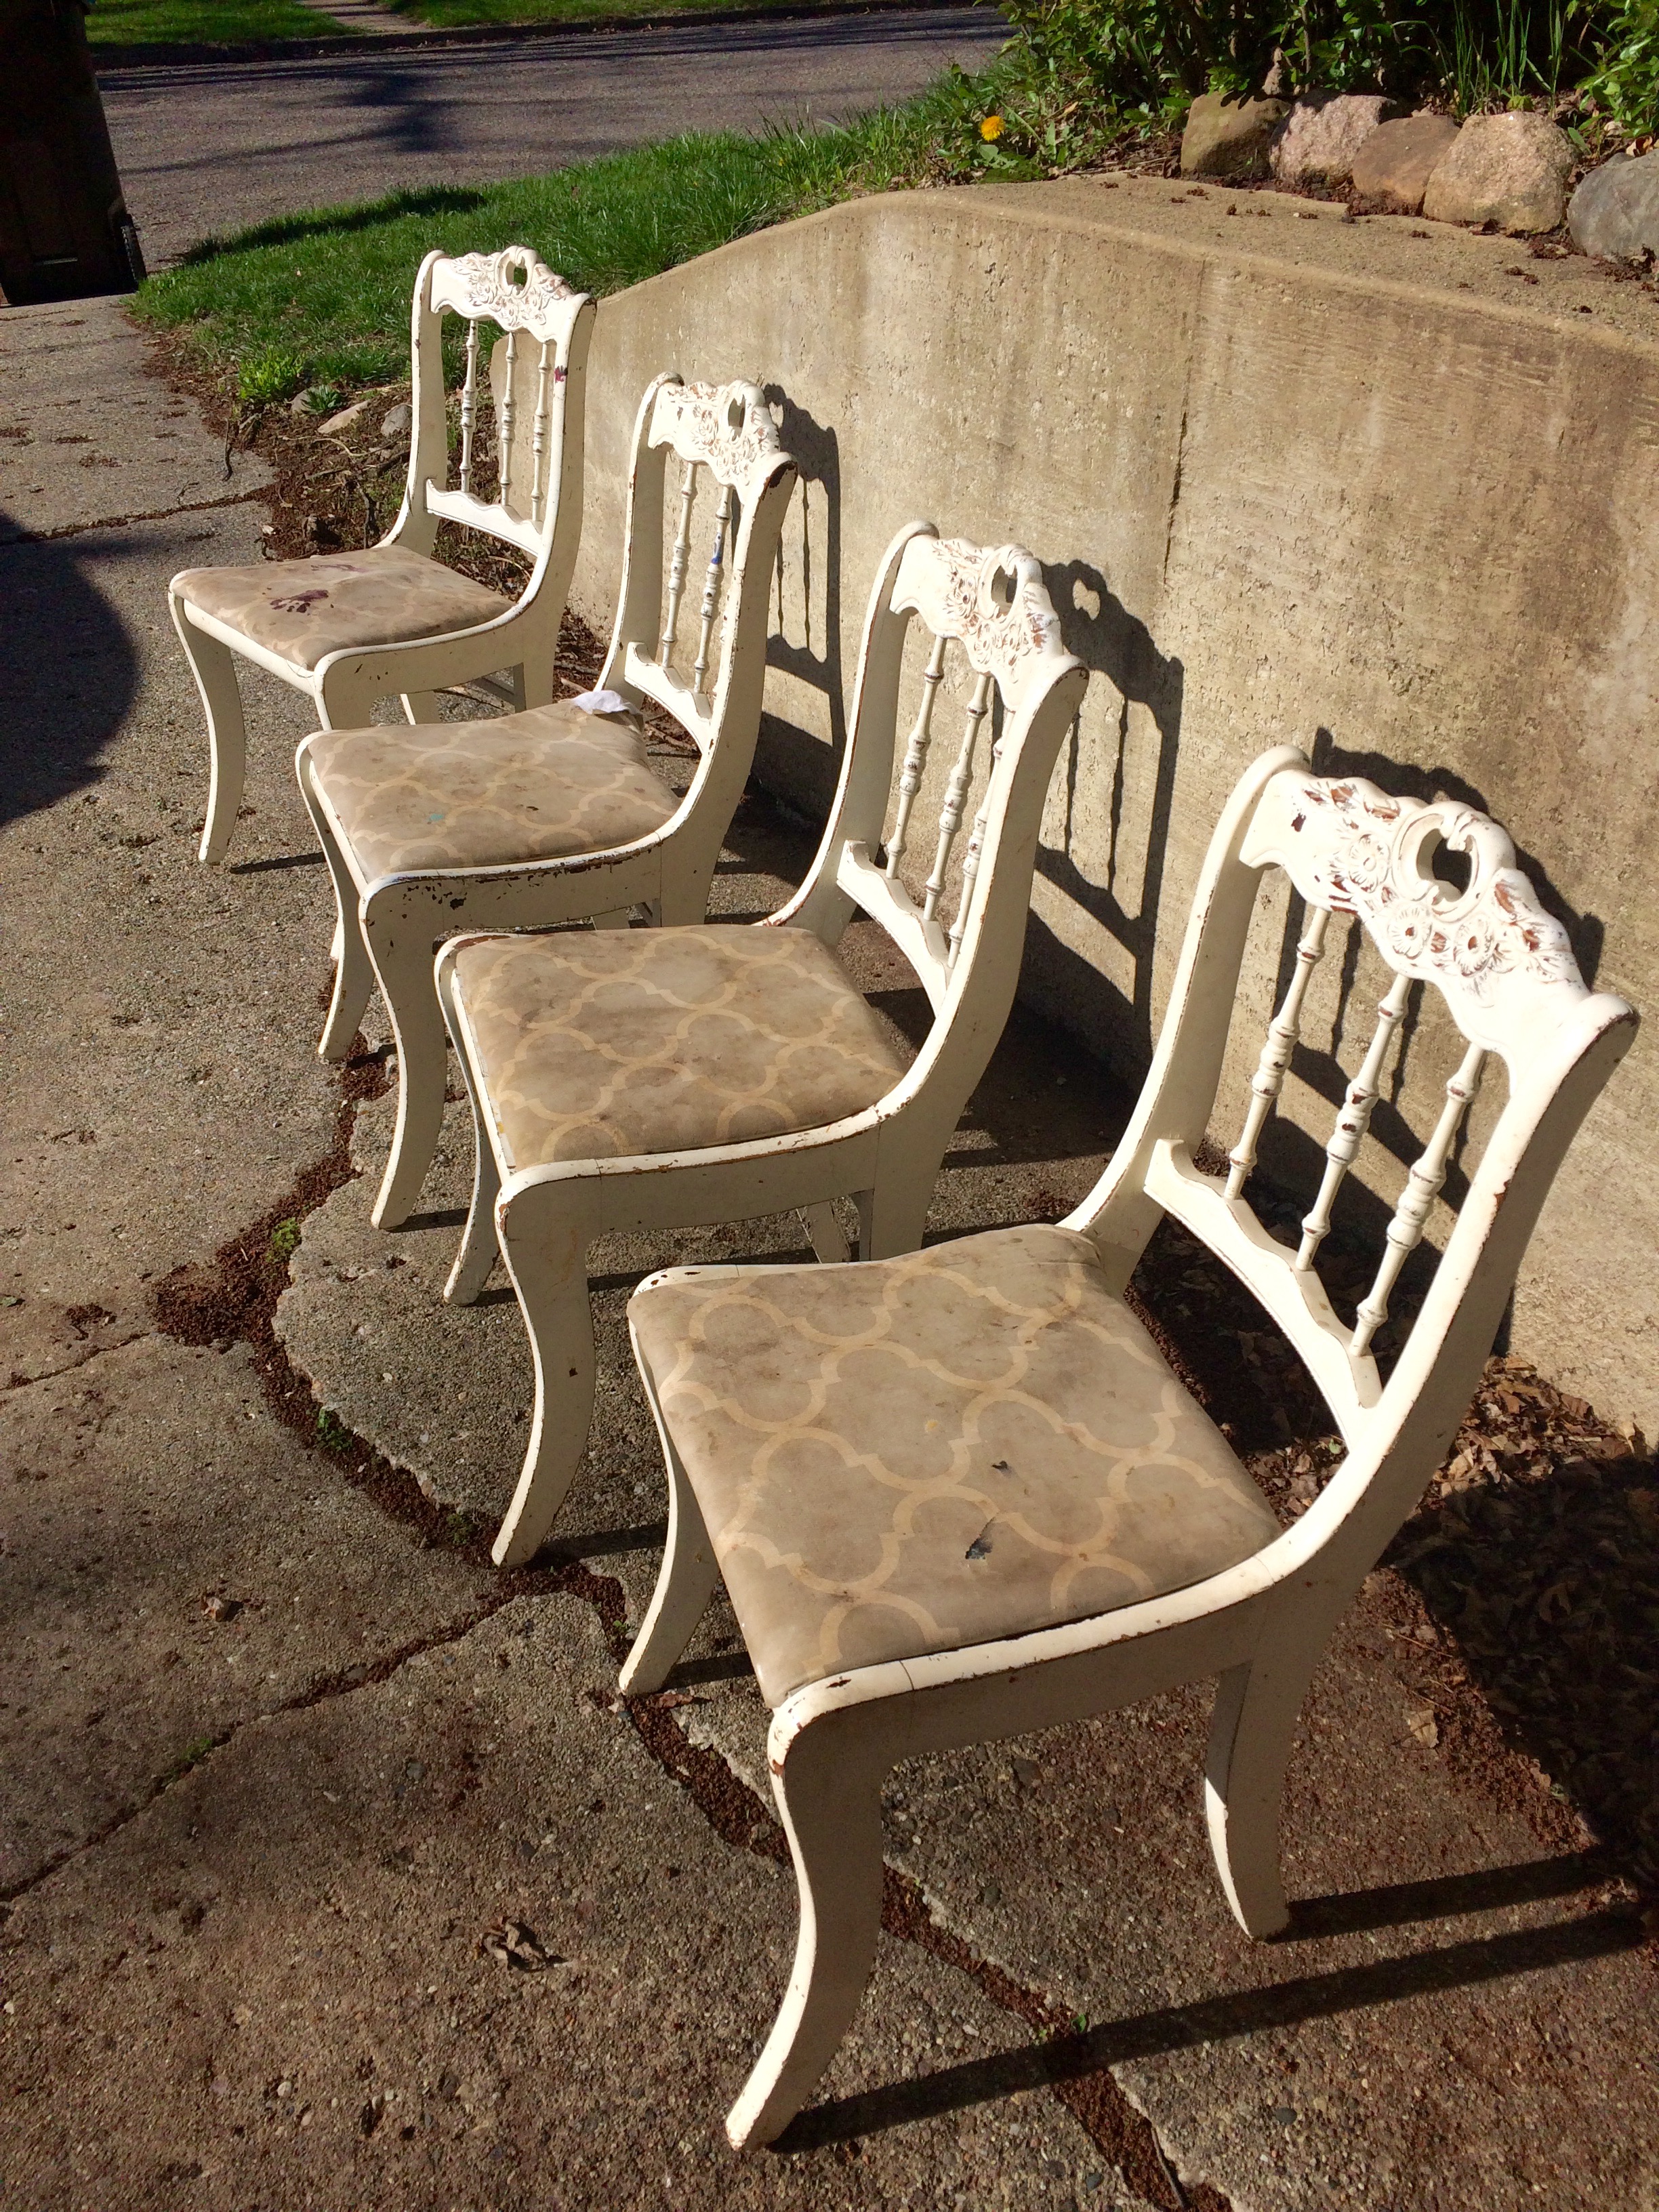
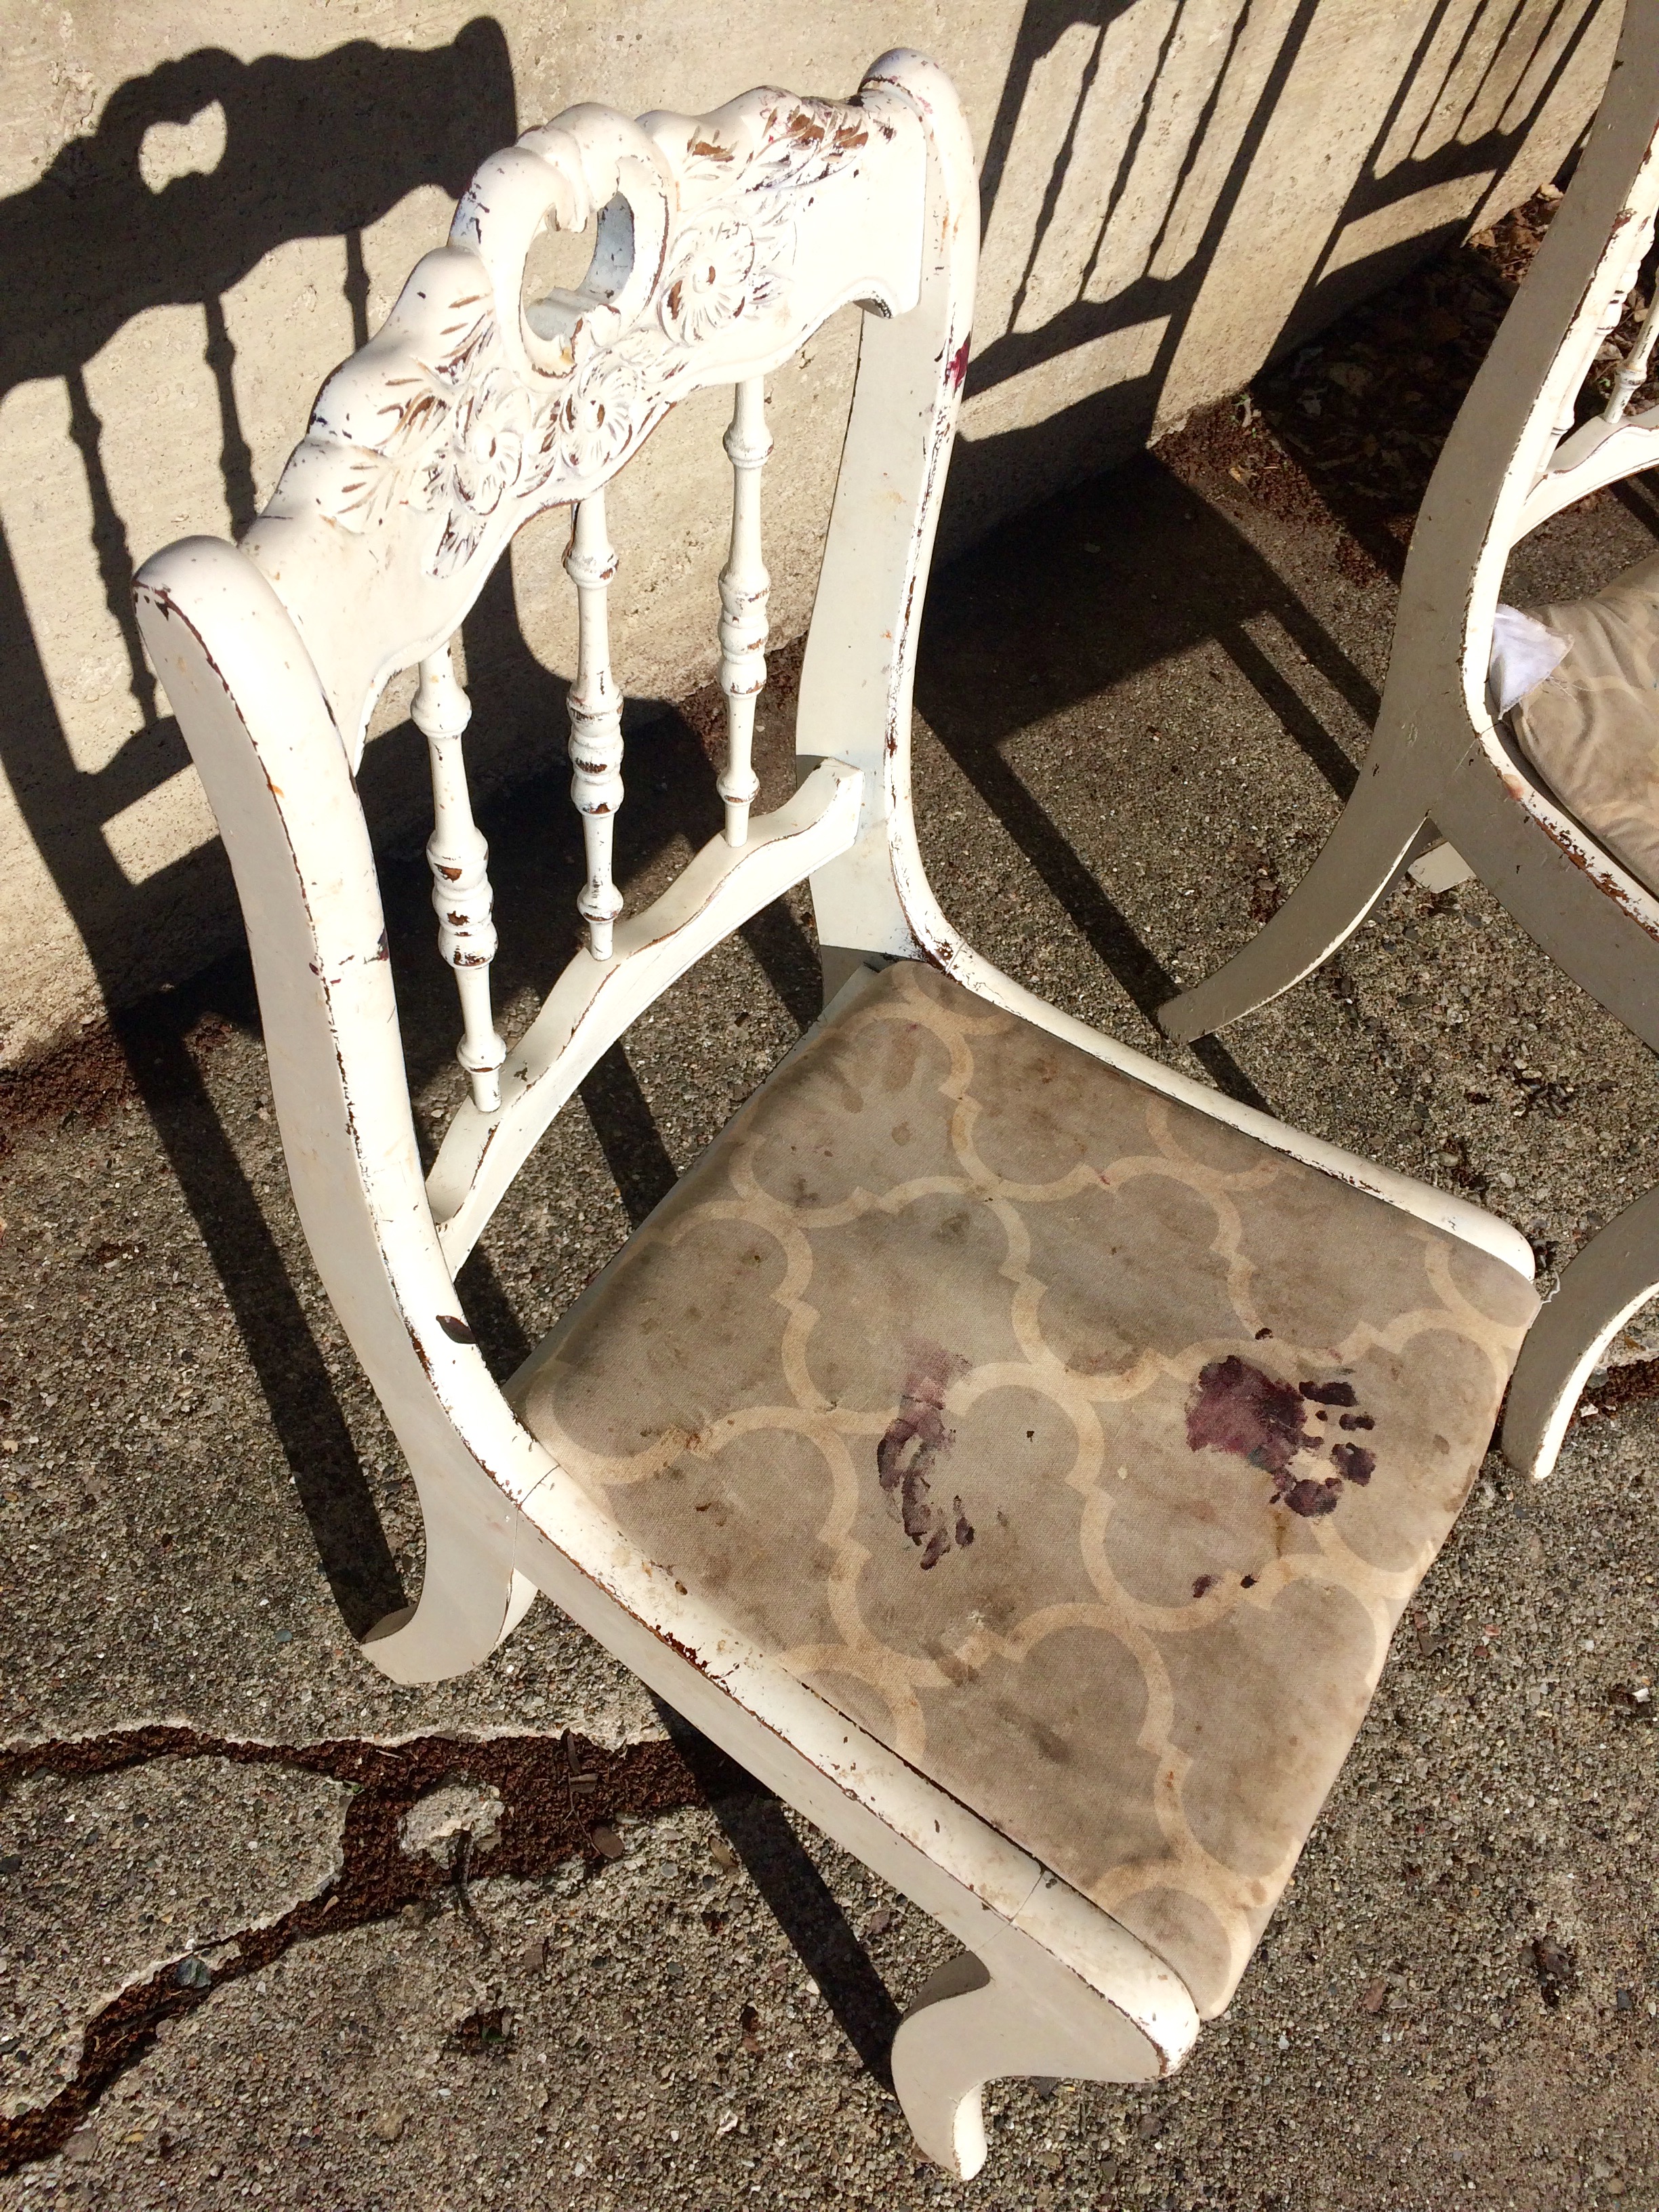
I had planned to clean up the chairs and reupholster the seats. They'd taken quite the beating between three young kids and a dog and needed a pretty thorough scrubbing. Note the hand print of finger paint on the upholstery.
I thought about keeping this fabric because that little hand print was just so stinkin' cute.
The scrubbing took a LOT longer than I had expected. There may have been some chiseling involved too. The bad part of furniture with all those intricate details is that stuff gets in there and doesn't want to come out. There was definitely some sweet potato puree. And what I think was at one point ice cream. And dog fur. So much dog fur. By the time all the scrubbing was said and done, enough paint had been stripped off that it was beginning to look more plain shabby than shabby chic.
I wasn't quite sure what to do about this, since I really didn't want to hand paint all of those little nooks and crannies. And I wanted the chairs to have that slightly distressed look.
Then this cream colored Rust-Oleum chalk spray paint caught my eye while perusing the paint aisle at Home Depot. It seemed like the perfect solution to just touch up the areas where the paint had come off.
I wanted to like this product and use it in future furniture projects, but it wasn't all I had hoped. Coverage was not good, even with multiple layers, and it sprayed on stringy. It worked for my purposes, and allowed me to get a distressed look without having to sand paint off after application, but I wouldn't recommend using it for full coverage.
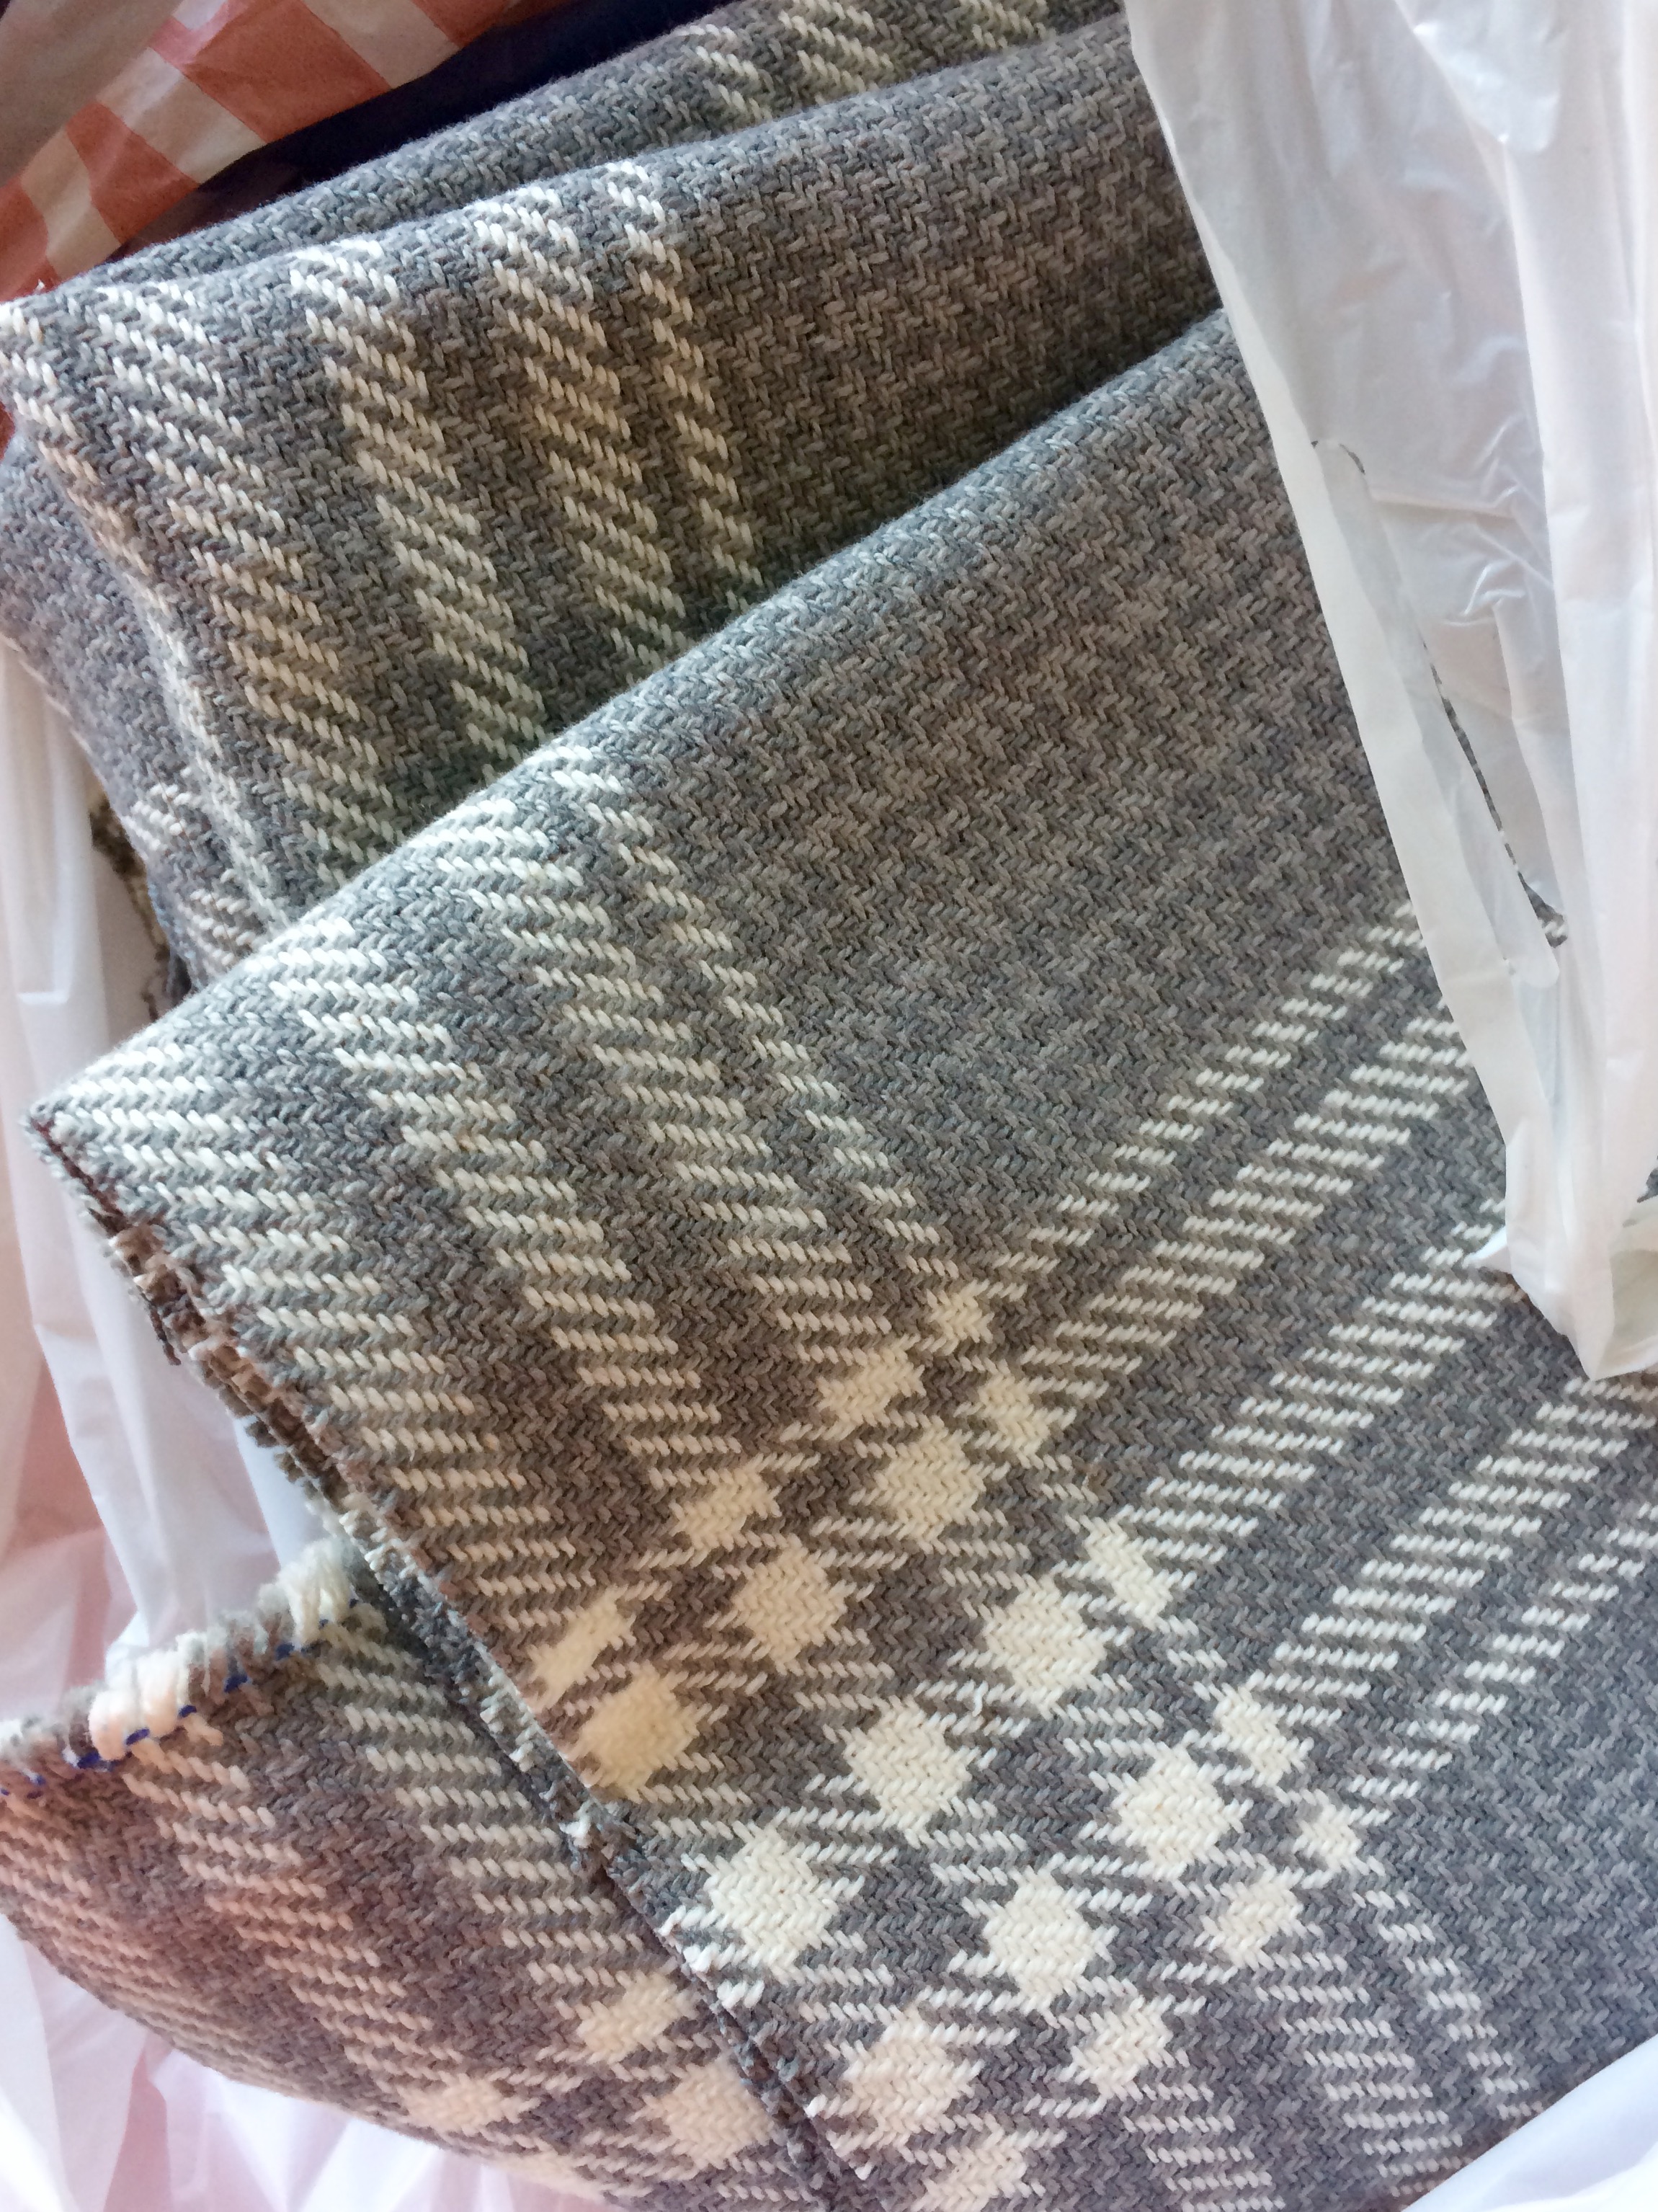
Once the chairs had been painted, it was time to reupholster the seats. Choosing fabric was far and away the most difficult part of the project for me. If you were to see me in the fabric store, your first thought would probably be, "wow, that lady is in the midst of the hardest decision of her life". It takes me longer to decide on fabric for a project than it did to decide I wanted to marry my college boyfriend. That either means I was really confident about getting married, or I'm way too indecisive about fabric.
It's probably both.
After much deliberation, I finally choose this grey plaid. Neutral + covers up stains well = win.
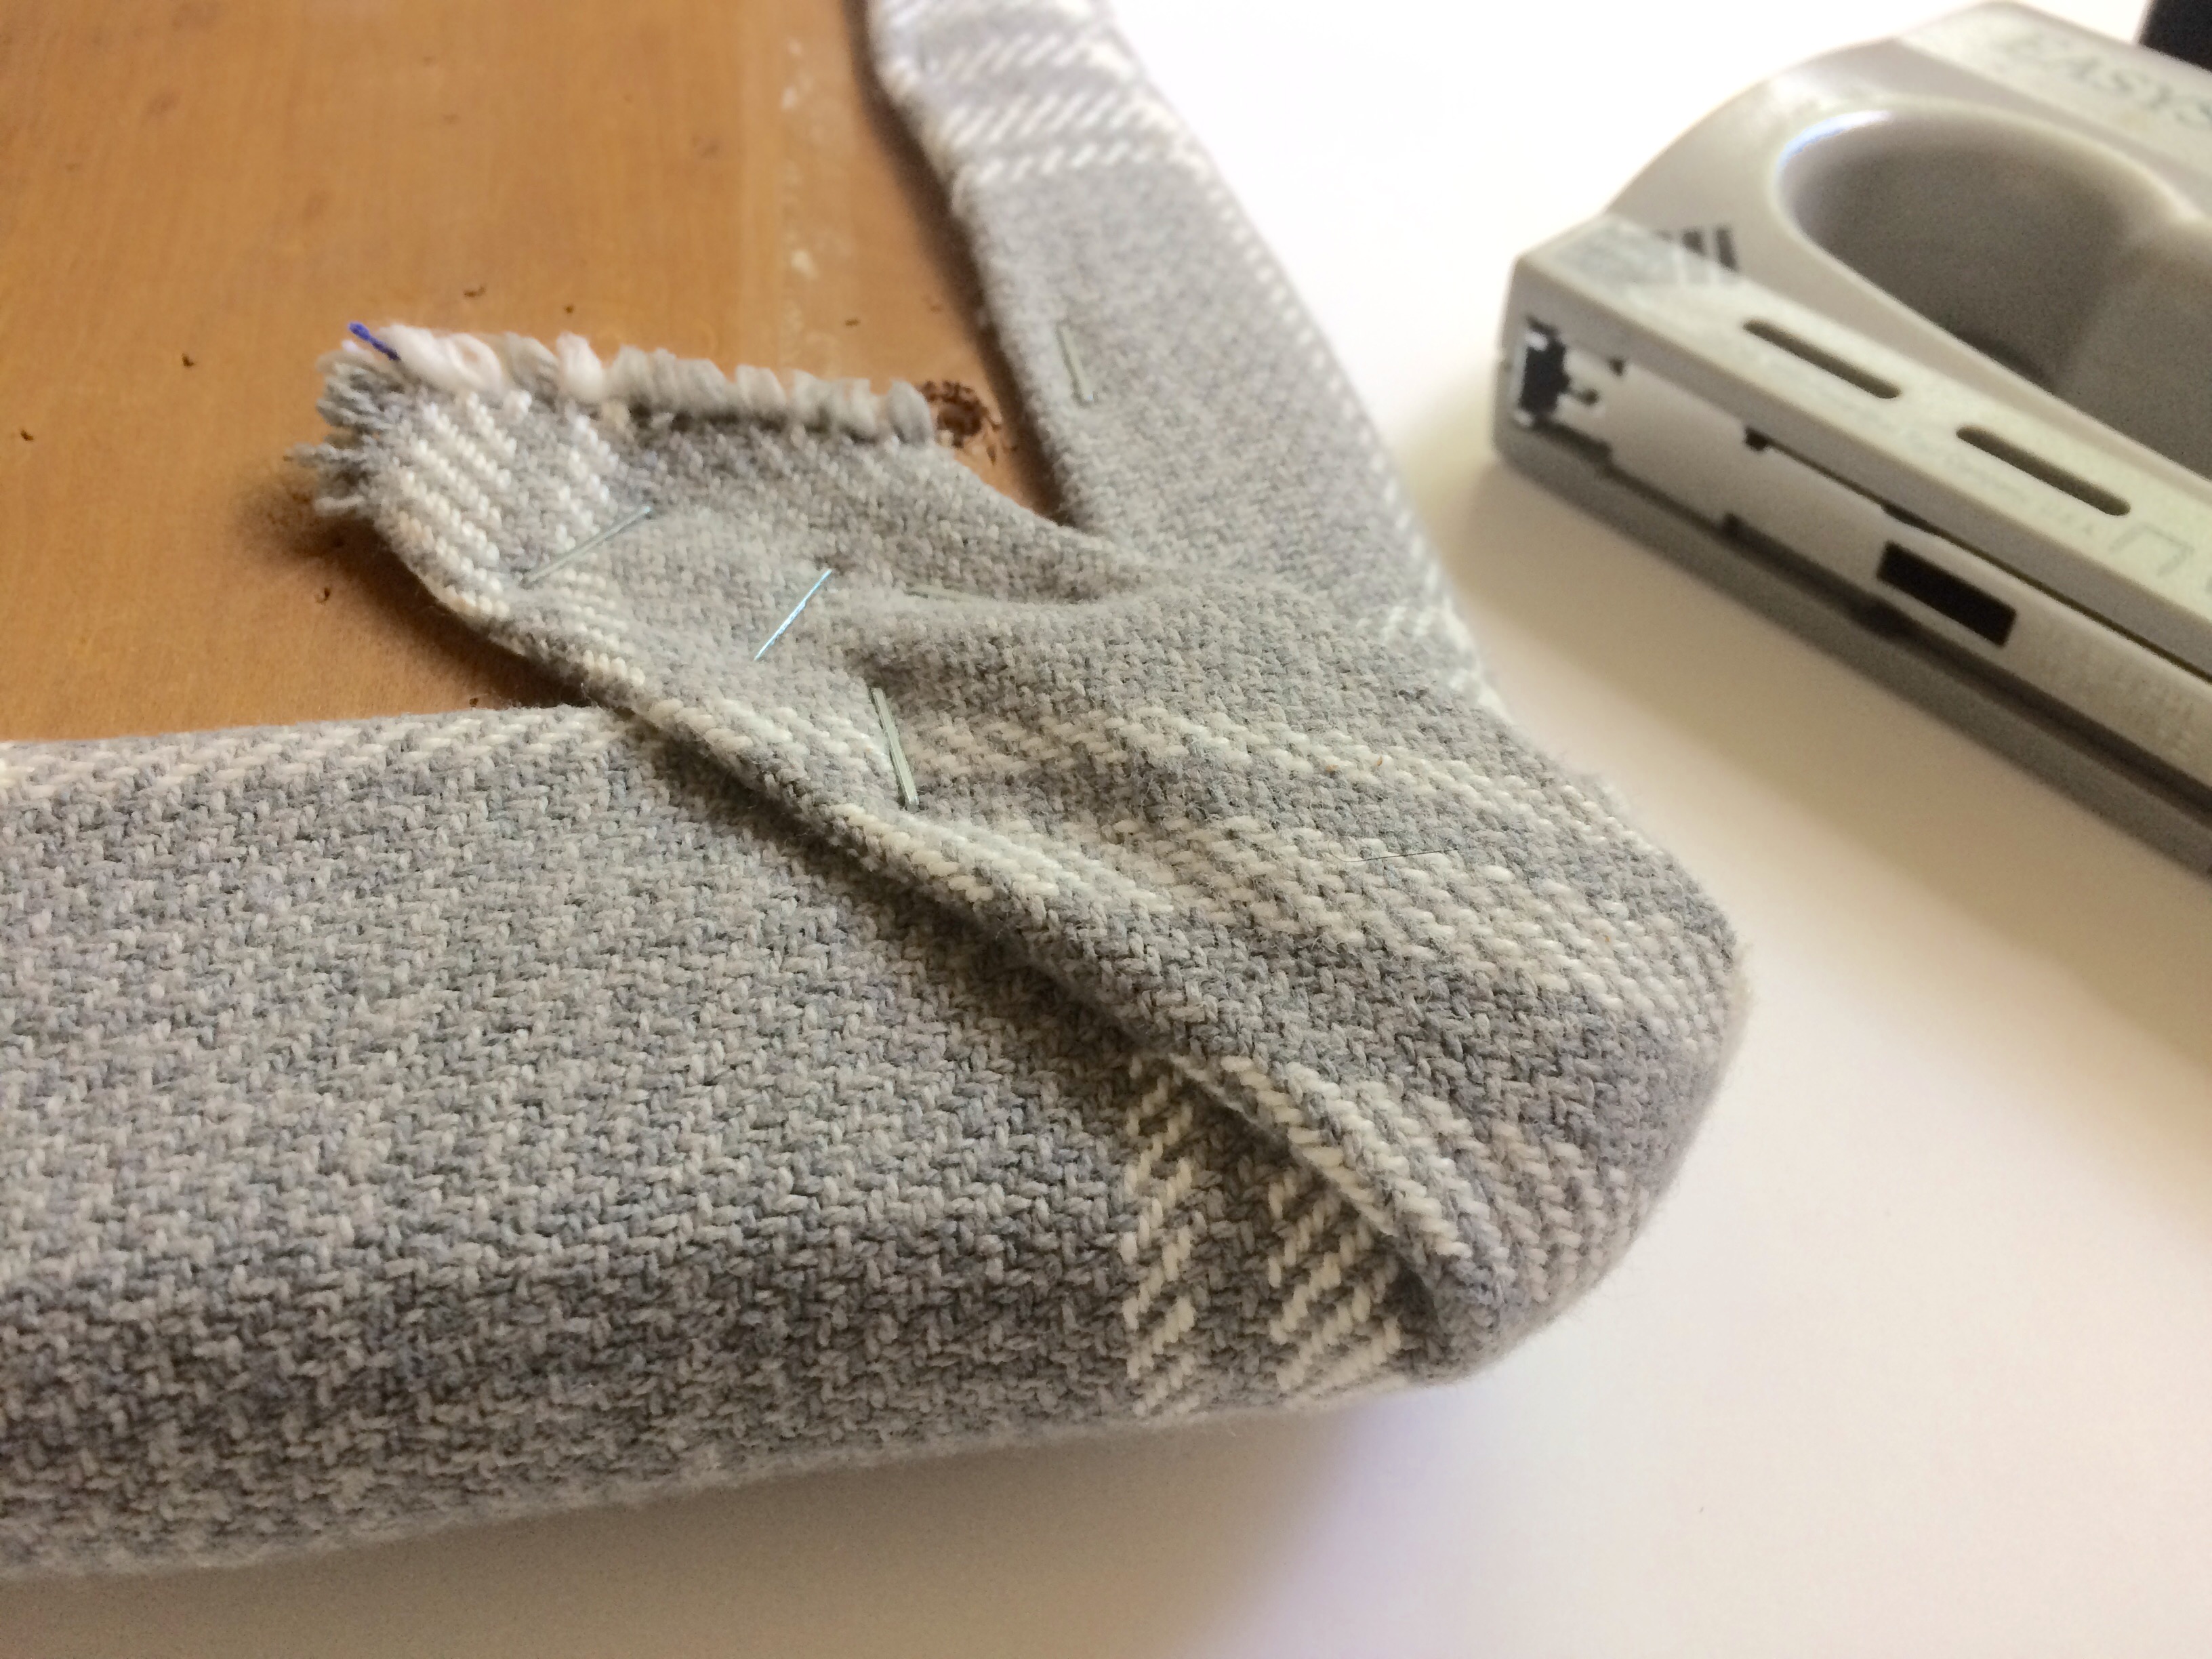
The seats were in good shape, so reupholstering went quickly. If you've never done this before, it really is simple. All you have to do is remove the old staples, take off the old fabric, cut the new fabric using the old fabric as a template, put the new fabric where you want it on the seat, staple it down, and reattach the seat to the chair.
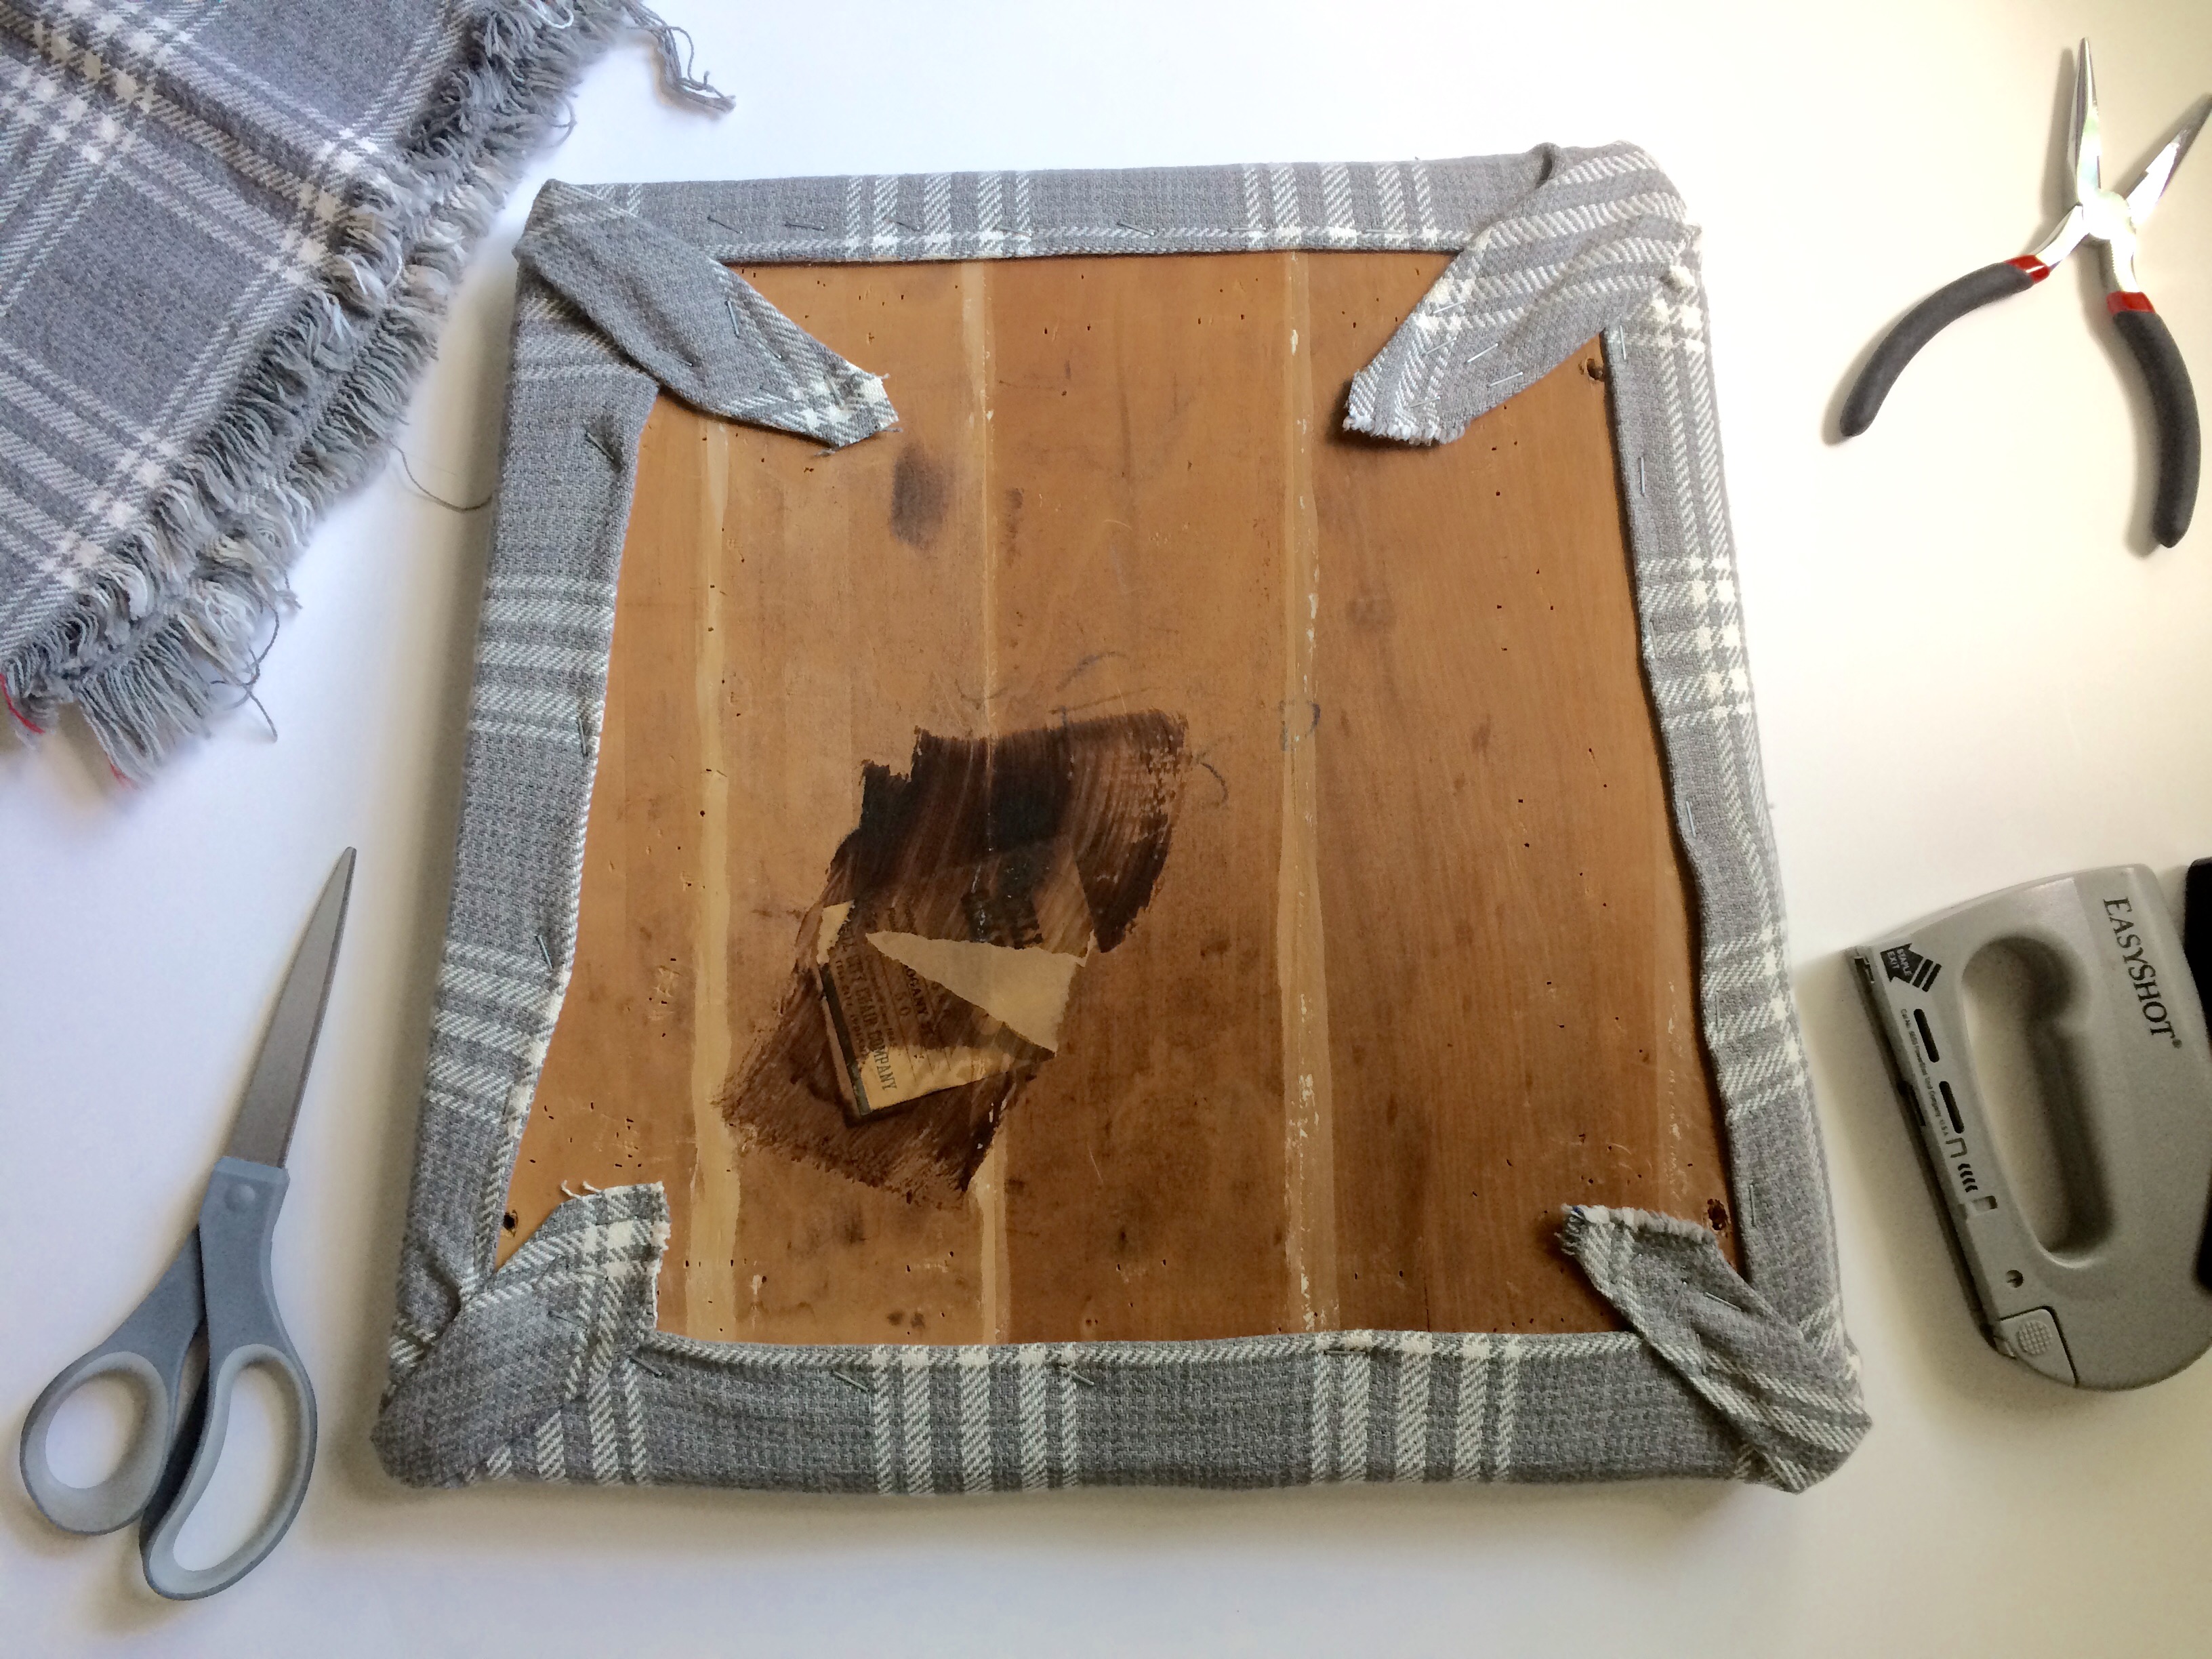
Definitely get a staple gun for this! I borrowed one from a friend thinking an upholstery staple gun was an expensive power tool, but I was surprised by how cheap they were. (I'm talking like $10!)
Here's how the chairs turned out! I'm really happy with them and am liking my fabric choice, although I am already contemplating what kind of fabric I'll want to use next...
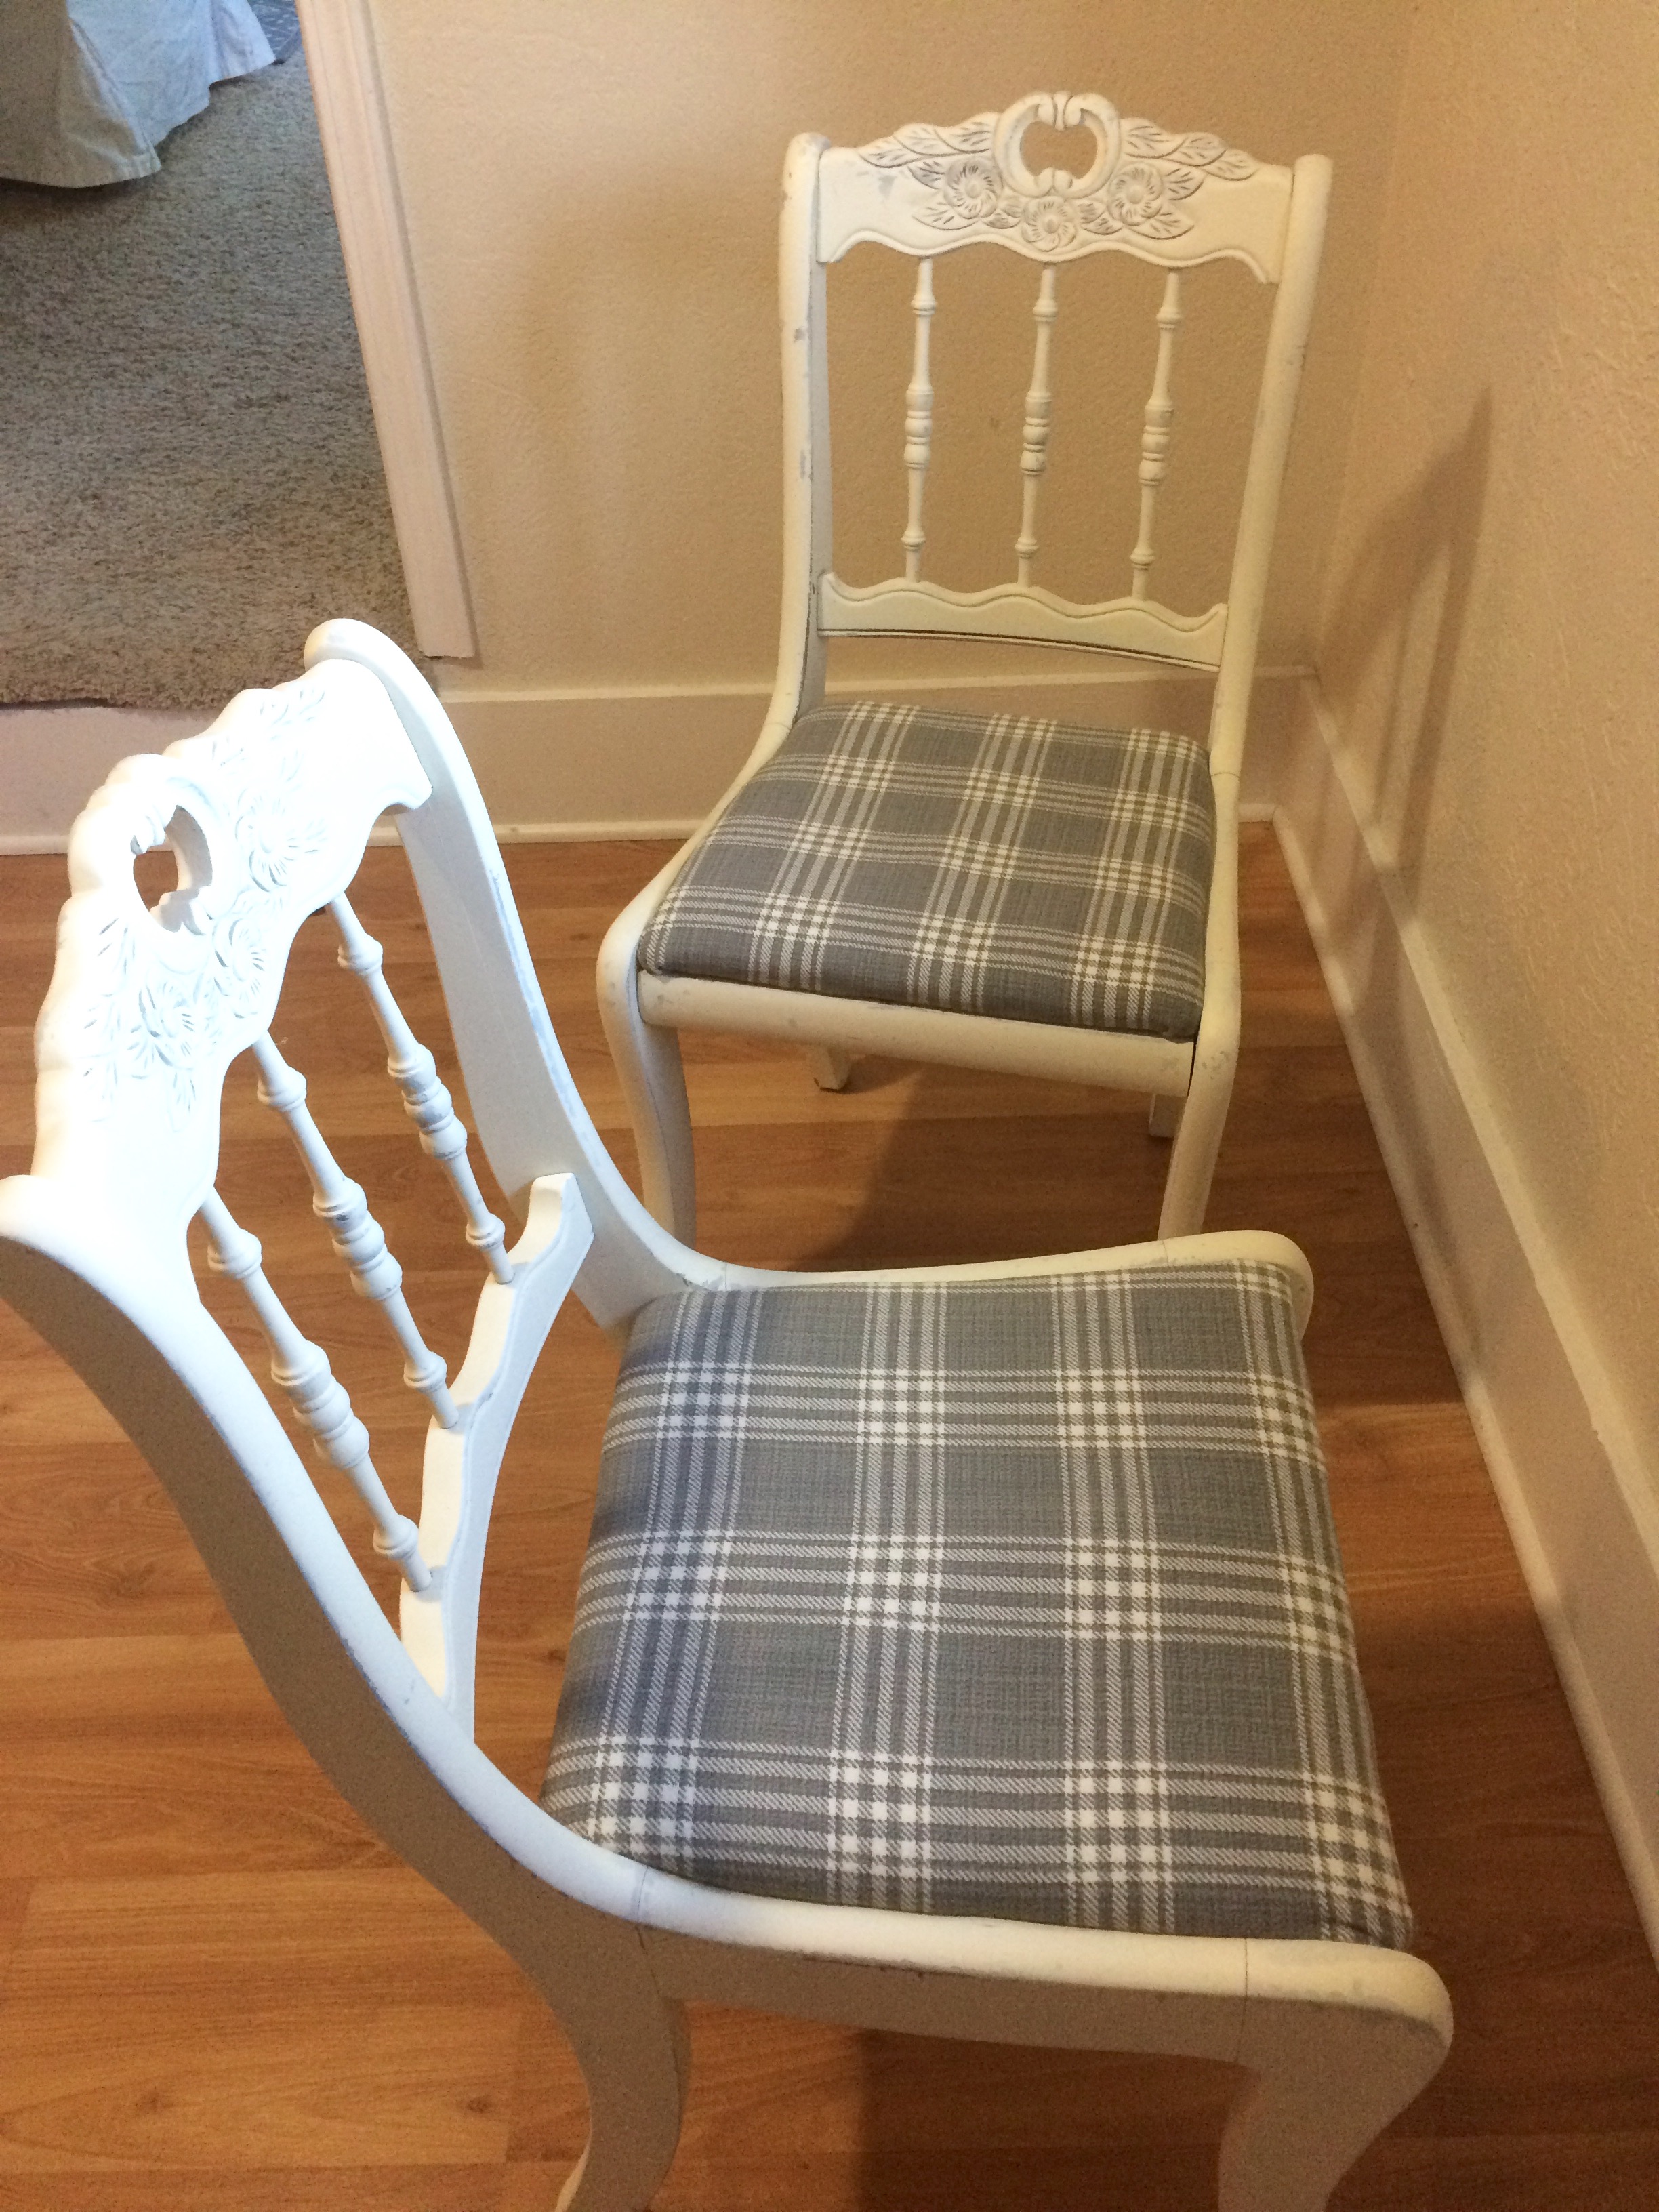
And because I love a dramatic before/after, here's a before/after.
Stay tuned for an update on the table! My most intense woodworking project to-date.
Leave a Reply