

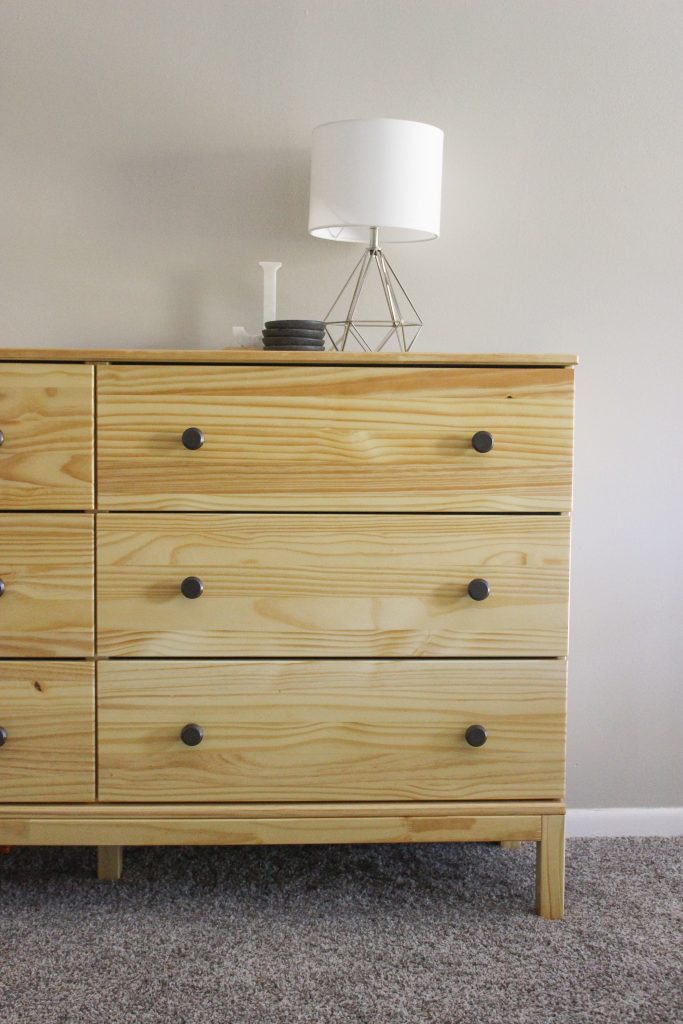
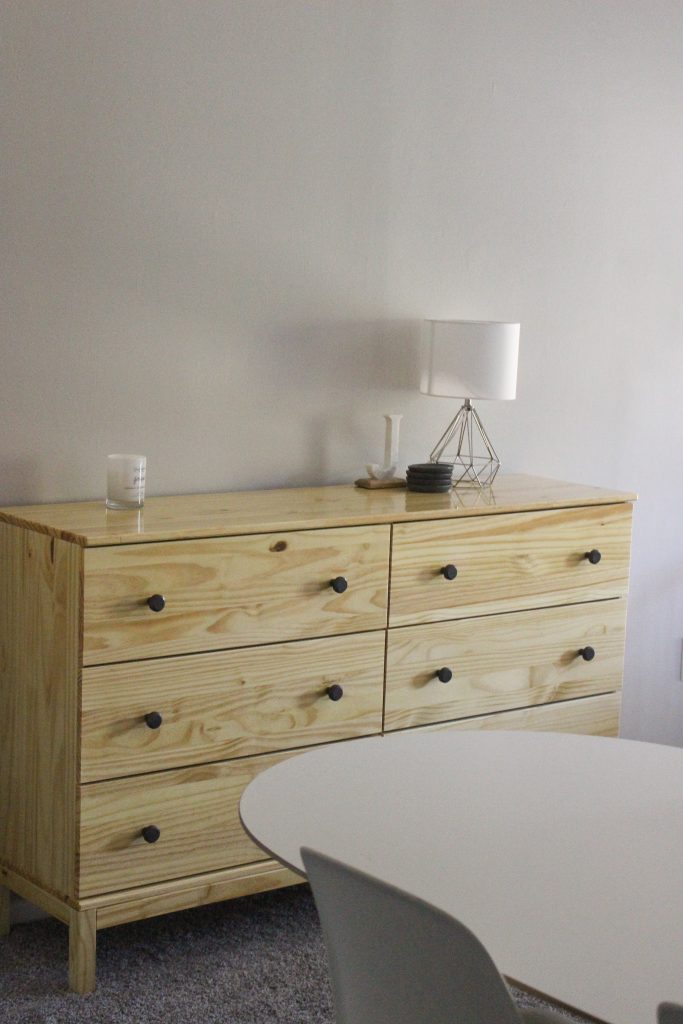
I had been on the hunt for a large piece of multifunctional storage furniture for our entryway. We have a long wall that's by the front door, the front closet, and the dining table, so we needed something that could serve both as a buffet and a basic entry console.
I shopped all of my usual online places, scoured all the thrift stores in town, and obsessively refreshed Craigslist’s furniture page for MONTHS, all to no avail. Then I turned to IKEA’s tarva series: all unfinished pine and not expensive!
Why do I ever stray from you, IKEA? You are the one for me.
I figured for less than the cost of a particle board dresser, I could have a solid wood dresser that looked exactly the way I wanted. I was sold.
Then! Things got even better. IKEA had a 30% off dresser sale. So we loaded into the car, got some meatballs, got our tarva, got too much soft serve, and went home to assemble.
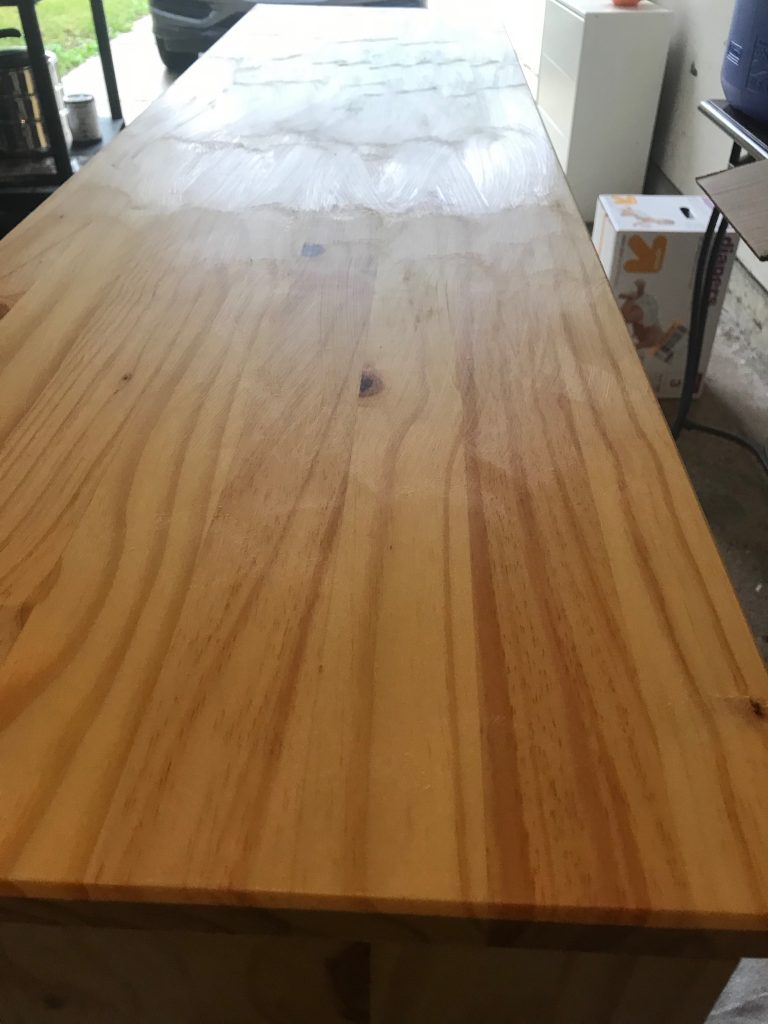
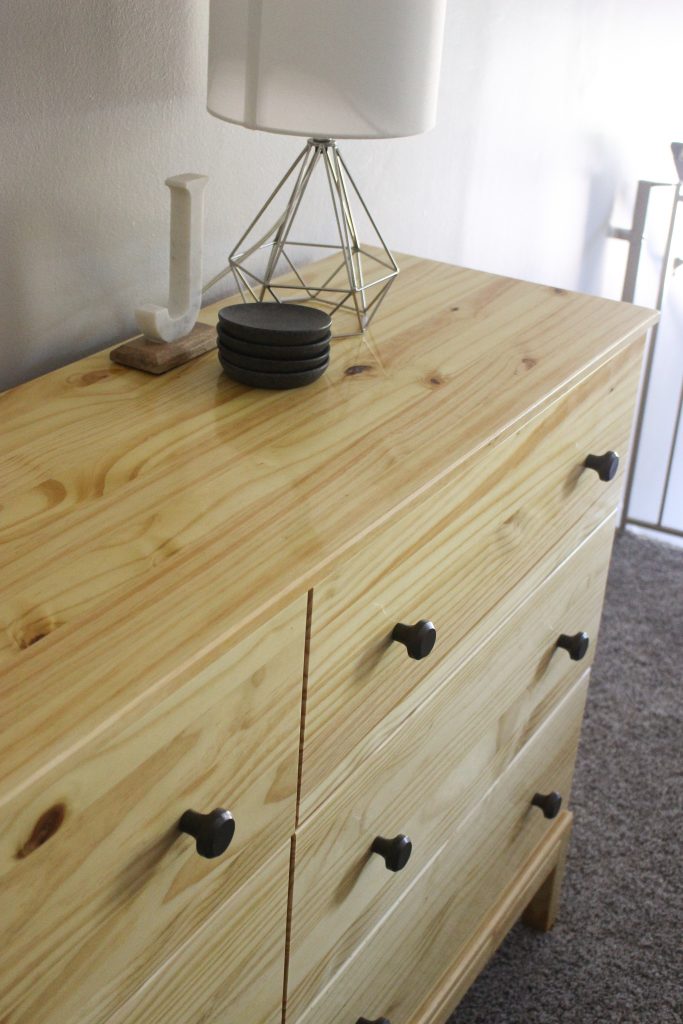
Since I wanted to really showcase the natural wood, while getting a bit of a warmer hue and a SUPER glossy, highly durable finish, I decided to forgo stain and finish my dresser using just an oil-based polyurethane.
Important to note: Pine can be hard to stain! It is knotty and has all sorts of wild grain variation in it. This means it is prone to being blotchy after stain is applied as the color of the stain is absorbed at different rates throughout the same piece of wood. This is not a concern with poly. I felt like I was beating the system here. Take THAT, laws of woodworking.
(I should mention that everything I know about woodworking, I learned from my dad, or from this subreddit. Sadly, I can’t go giving out my dad’s phone number on the internets, but Reddit is also very helpful!)
Here’s how I finished our tarva dresser:
First, I assembled the dresser, leaving the knobs and dresser backing off, and the drawers out.
I sanded the dresser and drawer fronts with sandpaper increasing from 100 to 150 to 220 grit. (I get a variety pack of sandpaper and wrap around a sanding sponge.)
To remove dust, I vacuumed the wood then wiped with a wet rag.
Once the wood was as dust-free as possible, I applied a thin, even coat of polyurethane. (Here's the exact poly I used.) I tried both a foam brush and a bristle brush for this. I liked the foam for smaller areas (drawer fronts) and the bristle brush for larger areas. See tips below if you’re not familiar with applying poly.
I waited 24 hours, sanded with 220 grit sandpaper, vacuumed and wiped down again, and applied an additional layer of poly.
I ended up doing three coats on the dresser and four on the drawer fronts, with 24 hours between each.
After the last coat, I let it cure for a few days. This coat did not get sanded.
Hand Waxing with Steel Wool
Once the finish had completely hardened, I hand waxed using furniture paste. This will help to make your furniture even more durable, and will buff out any dust bits or blemishes to give you a really smooth, lustrous finish.
All you’ll need for this step is 0000 steel wool, paste wax, and some clean cloths.
Get a good amount of paste wax on a piece of steel wool and rub all over your dresser - always going in the direction of the grain. If you feel any resistance, it’s time to get more wax.
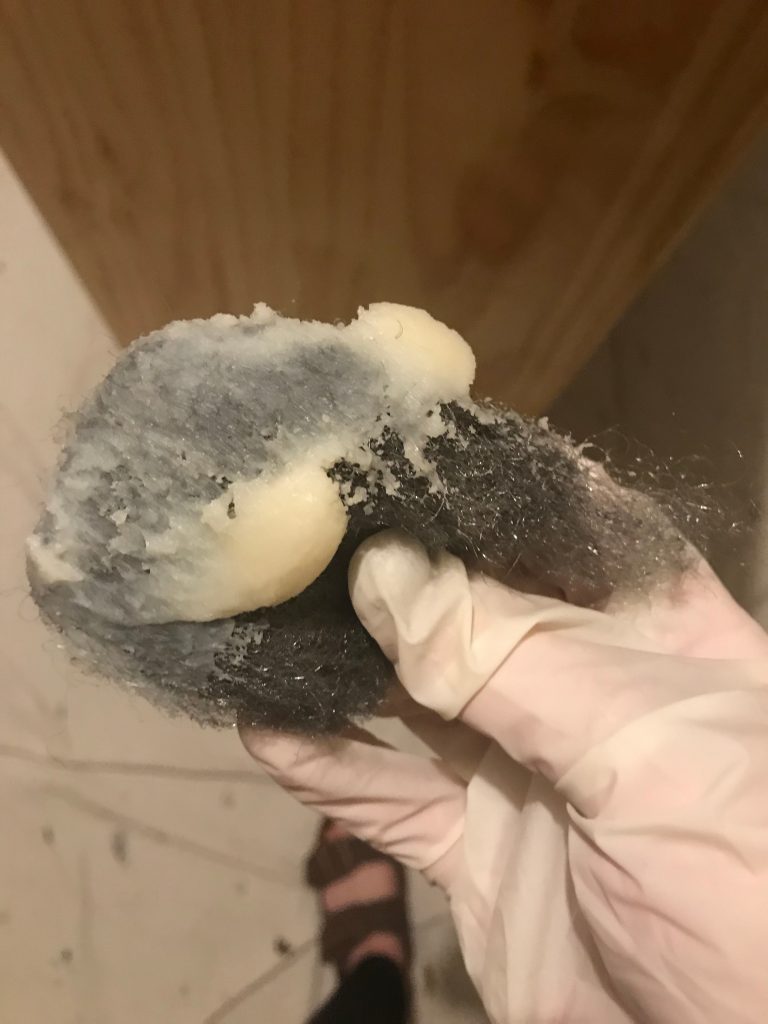
Once your piece is covered in a thin layer, go back and really use some elbow grease to work it in - still working with the grain - with the steel wool.
Buff out with a clean cloth until no wax residue remains.
Hardware
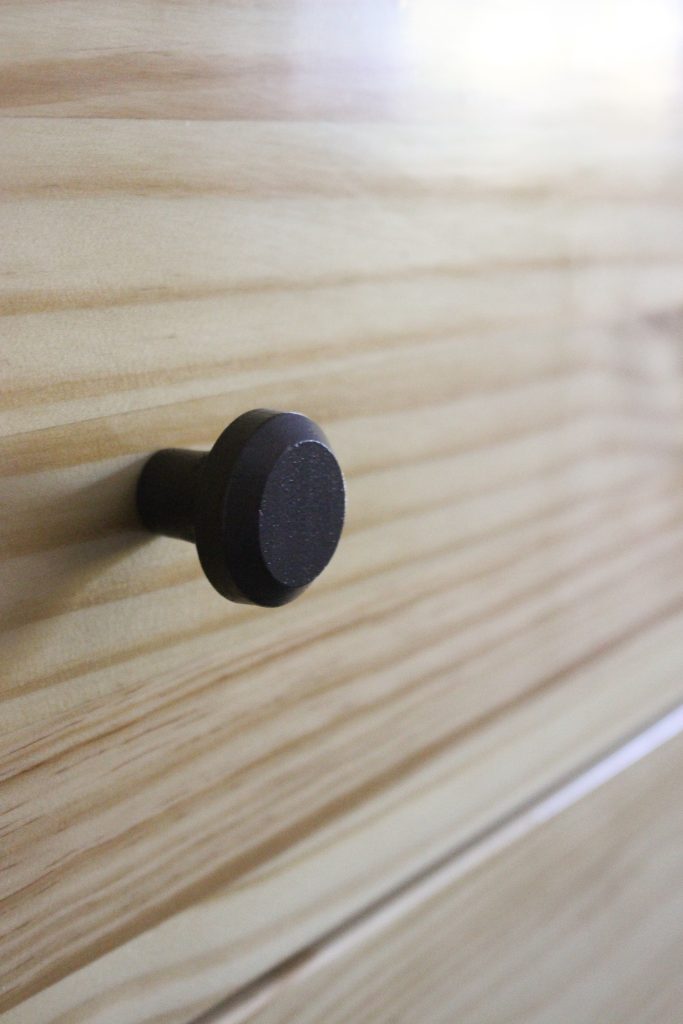
Lastly, I spray painted the wooden knobs that come with the tarva dresser with a metallic spray paint. I suspect this dresser will get a hardware upgrade at some point during its life with us, but I am liking the wood ones more than I thought I would!
Drawer Designations
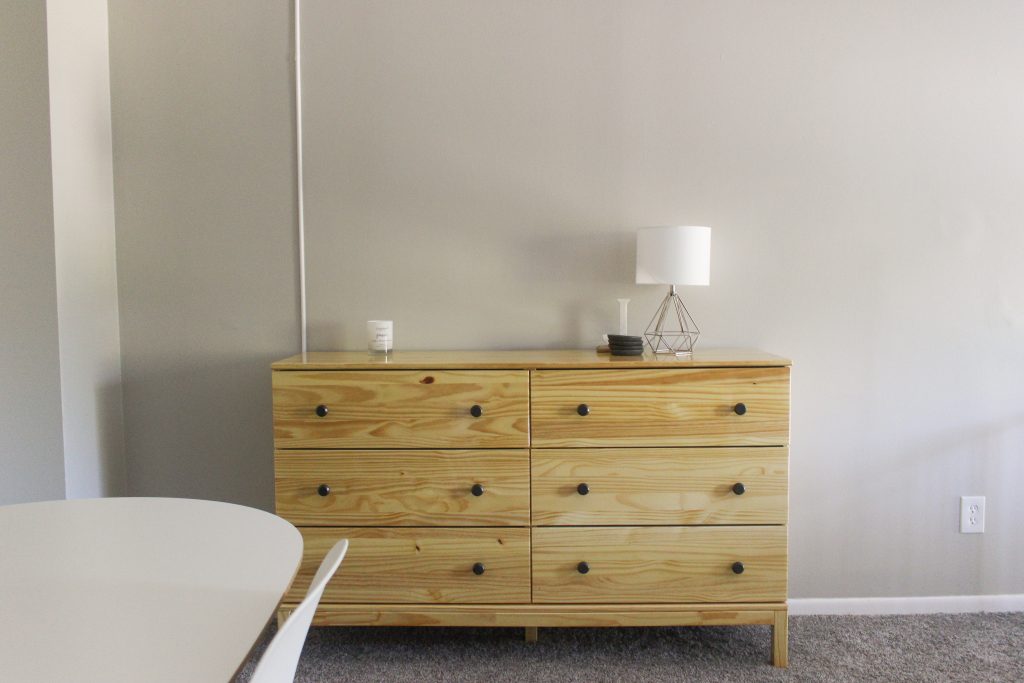
I love this dresser in the entryway. I can’t think of a single piece of furniture in our home that has made a bigger difference to the overall feel of a room. The extra storage space means there is way less clutter just hanging around on surfaces, the size makes the whole room feel much more balanced, and the natural wood look feels super cozy!
BECAUSE I KNOW YOU’RE ON THE EDGE OF YOUR SEAT WONDERING, here’s how we designated drawer space. (Please note, when I say “we” here, I mean “I”.)
| Craft supplies and mailing goods | Received mail |
| Table linens | Seasonal and miscellaneous decor |
| Hats/scarves/gloves | Toys! |
Here’s the most adult sentence I’ve said all year and possibly in my life: I am most excited about the mail drawer. We had no good spots to put the mail out of sight before, and it can clutter up a room/my life QUICKLY. Now it goes into the mail drawer and we know where all of it is.
What should we hang above it?
I feel like all this needs now is some fun art above it. Please humor me by looking at my mock-ups of the options.
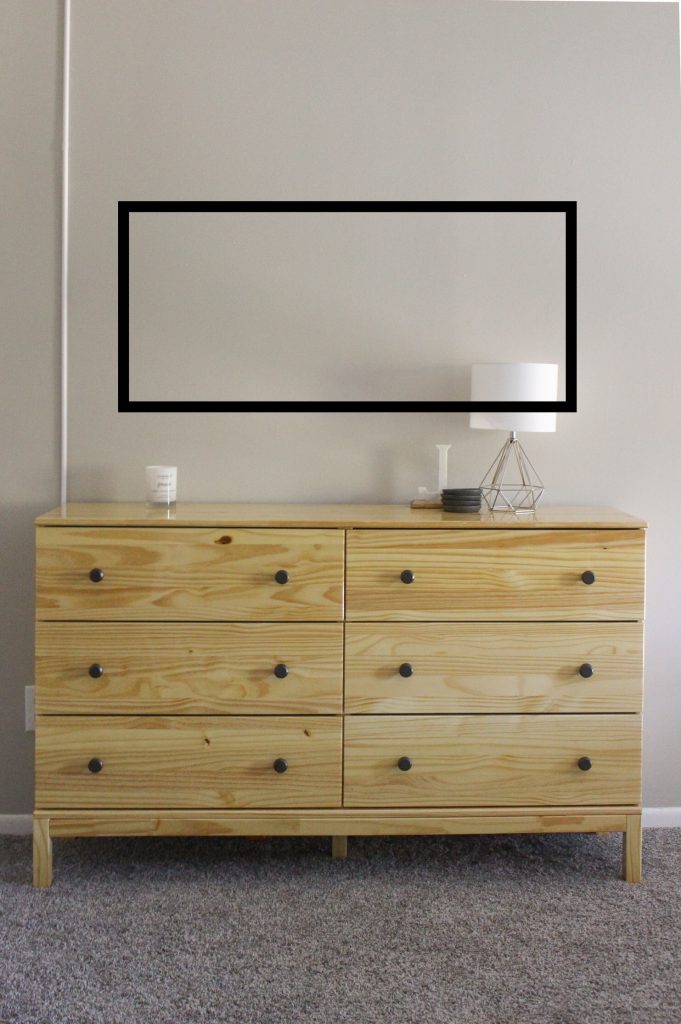
one long piece 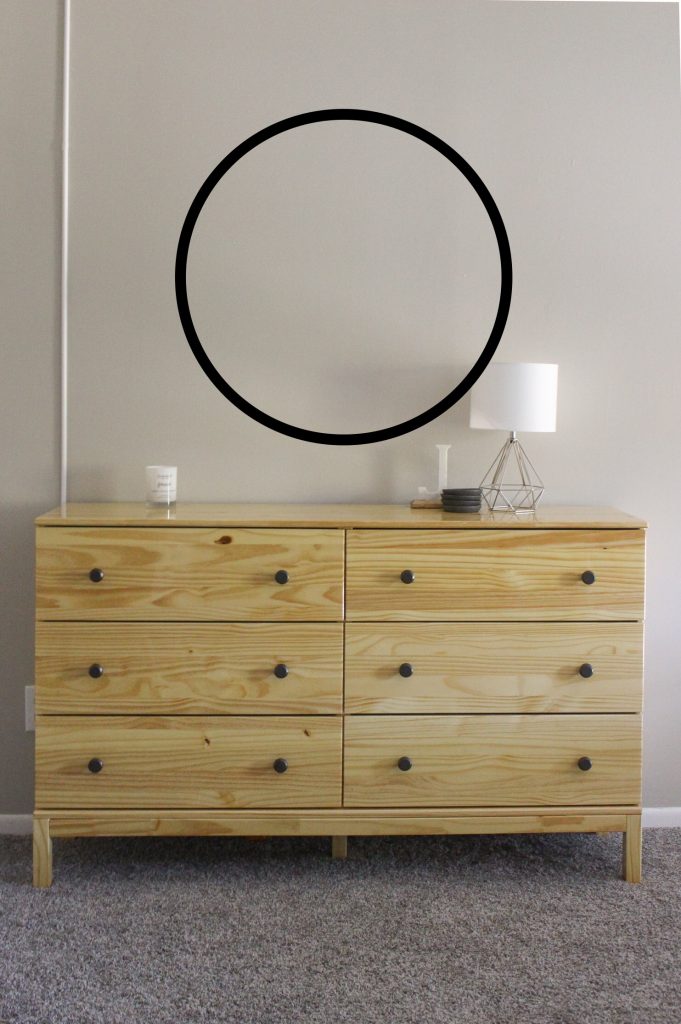
round mirror 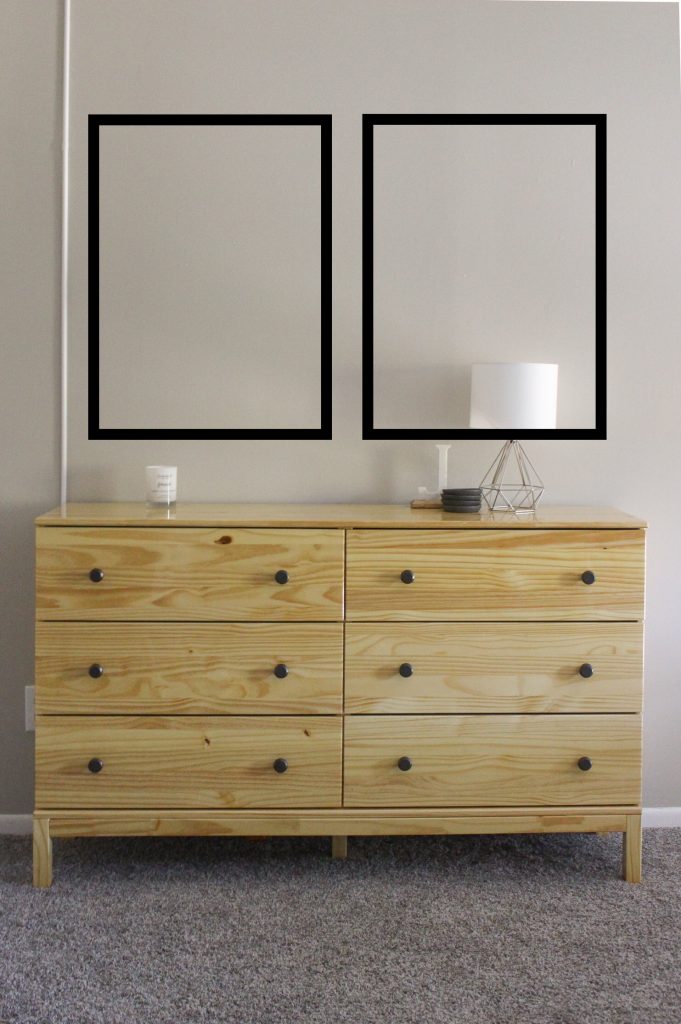
two tall pieces
I was initially thinking a round mirror because we don’t have a lot of light in here, but now that I’ve seen the mock ups I’m really being pulled toward the two tall pieces. Please form a strong opinion and advise!
TIPS FOR APPLYING POLYURETHANE
Keep whatever room you’re working in as free from dust as possible. You won’t be able to eradicate dust, but keep it to a minimum by vacuuming after sanding, and then wiping everything down with a damp cloth.
Watch YouTube videos before you begin. There is a learning curve to applying poly. It’s really different than paint. Get a feel for it by watching some videos (I like this, this, and this), and do some practice on the backs of drawers or any scrap wood.
If you see a spot you missed after applying a coat, leave it alone. You’ll get it on your next pass. Don’t go messing with an otherwise nice coat of poly.
Sandpaper is your friend! Any bubbles, drips, or drag marks can be taken care of with sandpaper. Be sure to sand them down before applying a new coat. The pressure is on for the last coat, though, because that one doesn’t get sanded!
Don't skip the wax. It's a really quick step that makes a HUGE difference in feel. It can take a poly job from good to great.
Realize that no one else will notice any imperfections. I noticed every dust bit and brush stroke in my poly coats while working on it, but now that it’s assembled and in our living room, I have to really look hard in good lighting to find them. Remember that (probably) no one is going to be coming into your home with a flashlight and magnifying glass to look for mistakes in your furniture’s finish.
I'm so happy with how our tarva turned out!
If you like the natural wood look, but want a piece that can withstand heavy traffic, I highly recommend using polyurethane. It takes longer than painting, but will give you a more durable - and (I think) more distinguished - result!
Leave a Reply