A dedicated closet for storing and organizing wrapping supplies!

Present wrapping is a big deal in my family. We view it as part competition, part an essential element of any gift. It adds pomp and fun and thoughtfulness and we do things like admire particularly good boxes and bows.
The only problem is that wrapping supplies take up lots of space and can be awkward items to store: boxes, tissue paper, bows, rolls of paper. Not to mention the vital (and easily lost!) scissors and tape.
Between lots of moves, I'd never settled into a wrapping station. All my supplies were kept in an under bed storage container, which worked well enough but was inconvenient to get to. Here I wanted something more permanent and easily accessible. I knew the closet in the bonus room would be up to the task!
Here was my criteria:
- Easily accessible: I wrap presents enough that having to go the basement or lug out under bed storage is really inconvenient.
- Orderly: To quote my 7th grade math teacher, "there's a place for everything and everything has its place." (Let it be known that I also remember some algebra.)
- Versatile storage: I not only wanted to store all wrapping supplies here, but I also wanted to use this as a holding zone for not-yet-wrapped gifts. That's right, you found my hiding spot. Don't tell my kids.
Prepping the Closet
The first order of business was getting the closet ready. Which meant moving all of the things I'd stashed in there after moving in and putting it where it belonged on the floor, just out of my camera's frame.
I took down shelves, patched holes, and painted the closet from ceiling to carpet. I'd initially planned to paint it white, but after I was halfway done with the first coat - and halfway though the paint I'd bought for the task - I realized I would not have enough.
My painting stamina was waning at warp speed and I knew I could not bring myself to make yet another trip to the Home Depot paint counter that week. Plus, what I'd wanted to be a crisp-white closet was looking inexplicably dingy, so I decided to use the leftover Boothbay Gray from the trim.

Two things I've learned from this:
- I always severely under or overestimate how much paint I will need for a job. I'll either run out 1/4 of the way through, or have twice as much as I need. There is no middle ground.
- I should paint all of my closets fun colors! I love it so much!
Also! I covered the wooden shelves with contact paper. I had planned to paint them but see above about my painting stamina.
Organization
So much needed to fit in here! Let's just go through each major feature:
- Shelves: You can't see it in these pictures, but this closet actually goes pretty far to the left and it's all shelves! These are being used for storing boxes, gifts needing to be wrapped, and Christmas paper.
- Drawers: The top drawer has bows/ribbons/labels, the middle has tissue paper, and the bottom has gift bags.
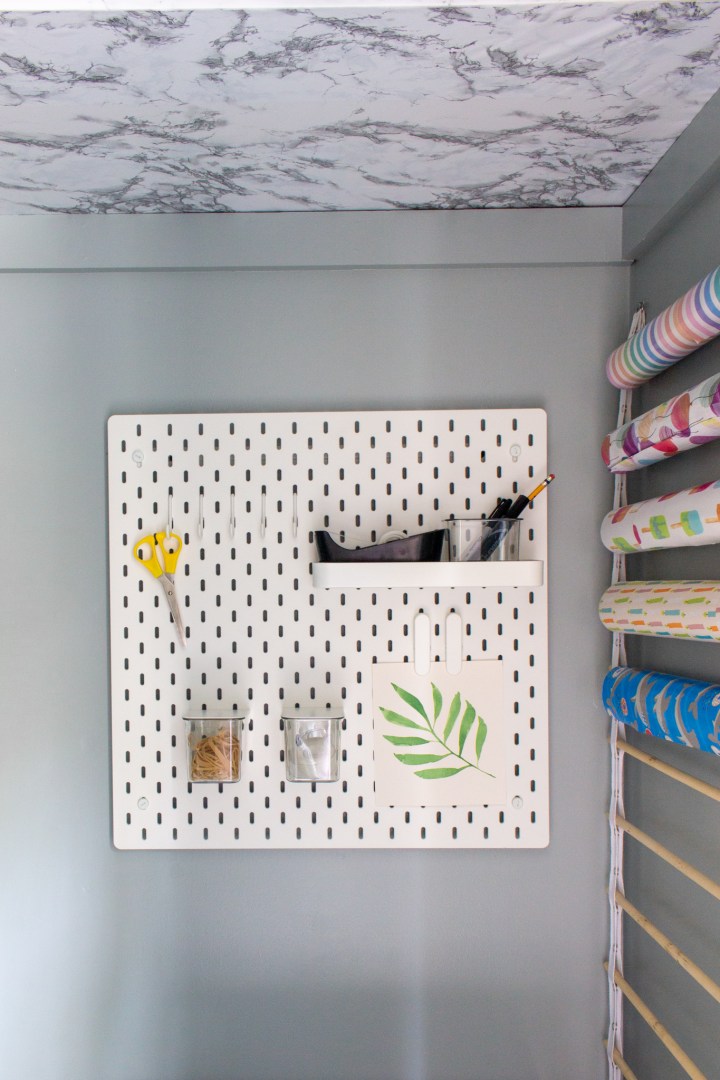
- Pegboard: For frequently-used items like tape, scissors, and pens that can just be grabbed when needed and put back easily. These have been declared wrapping-specific items, so I am (maybe naively) confident they won't disappear to other areas of the house for other tasks!
- Wrapping Paper: A DIY vertical storage solution for all of my year-round paper. It was easy! Tutorial coming next week!
- Christmas Paper: Since I only use Christmas paper for one month out of the year, I decided I didn't want it out with the rest of my paper. So, it's in a tall basket in the back of the closet that I can pull out in December and then put away for the rest of the year. This also will be nice for taking it to the living room for Christmas movie/wrapping nights!
This probably was the feature of this room I was most looking forward to, and I'm so excited about how it turned out!
Here's a before and after, just for fun. It's come a long way!
Come at me Christmas, I'm ready for you!
Up Next
That wraps up (ha!) week 3 of the One Room Challenge. (You can head here to see what other participants are working on!). Here's what's coming next for the bonus room:
Week 1: Plans for the Bonus RoomWeek 2: Contrast TrimWeek 3:Wrapping Closet (you are here!)- Week 4: Whiteboard Wall (maybe?)
- Week 5: IKEA Desk Hack!
- Week 6: Countertop for Desk
- Week 7: Desk Organization
- Week 8: Reveal!


Tina Robin says
What materials for the hanging wrapping paper
Mandy Jackson says
Hi Tina, you can find the tutorial + materials here:
https://mandyjackson.com/2021/10/21/diy-hanging-wrapping-paper-storage-solution/