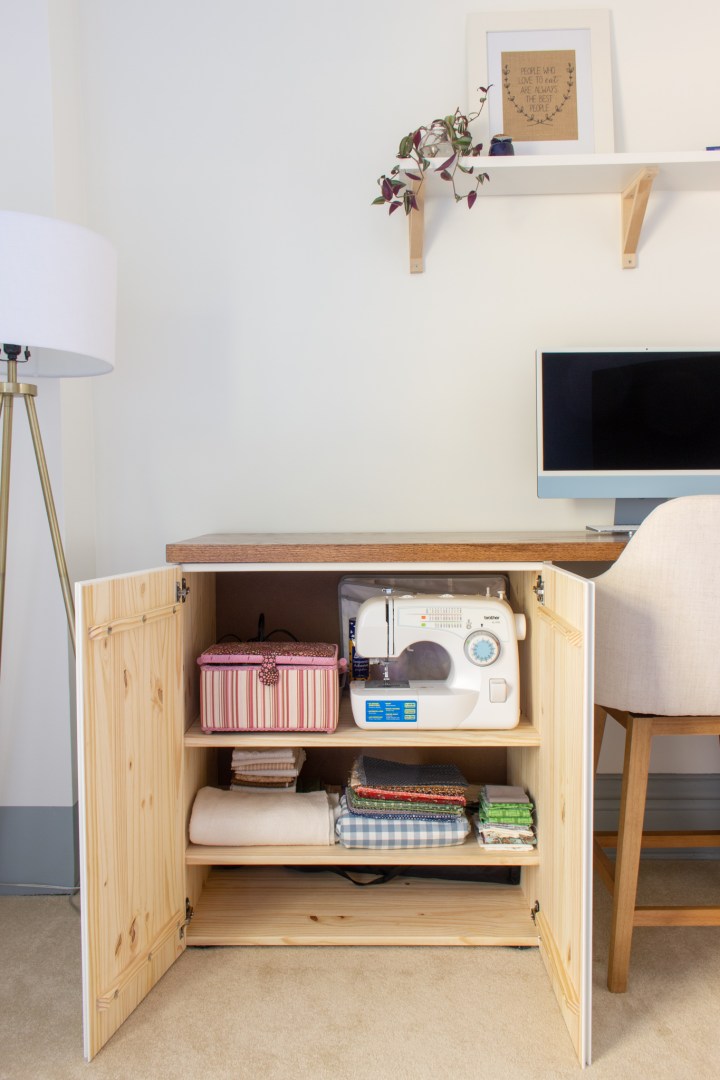
A peek inside my Ikea Ivar desk for anyone who's looking for ideas on organizing a drawer-less desk, or anyone whose guilty pleasure is looking into people's cabinets. Let's do it!

I was so excited to get this desk organized, partly so this room would feel fully-functional, but mostly because all of its contents were previously living on the floor after being evicted from the closet to make room for wrapping paper. (And let me tell you that this stuff took up... a lot of floor space.)
Here is what I needed to fit in my two cabinets: Sewing supplies, tripods, cameras/lenses, office supplies, stationary, printer, miscellaneous craft supplies that ought not be accessible to children.
Thankfully, the Ivar has tons of storage space! Like, almost more than I knew what to do with.
Divvying Up Cabinets + Shelves
I initially had wanted to make one shelf a kids' craft supplies shelf that they could help themselves to, but after going through every configuration and realizing there was no way to fit all of the sharp needles, expensive tech, permanent markers, and anything flammable in a single cabinet - plus my interest in not having paint on our carpet - I decided to relocate craft supplies elsewhere and take full dominion of the desk cabinets.

Instead of grouping cabinet contents into dangerous and not dangerous, I mostly organized them based on task. The cabinet on the left is for sewing supplies (sewing machine, sewing basket, fabrics, batting), plus my tripods. These are all the way on the bottom since I don't use them more than a couple times a month usually.

On the outer side of the left cabinet, I hung my cutting mat using a command hook. So happy it fit perfectly! It's one of those items that's hard to find a place for that's easily accessible while also being out of sight. Here, I have to be standing in the corner of the room to see it.

The right side houses all of my office supplies and frequently-used camera equipment. This includes writing utensils, camera + lenses, cords, my greeting card box, our printer, mailing supplies, and stationary.
(Can't not tell you that our printer might be the MVP of this whole project. Wireless printing! from my phone! Josh tells me this is not new technology, but it's new to me and has been LIFE CHANGING.)
Cord Management
Oh, you noticed the printer is inside of a cabinet and also plugged in? Yes! The cord goes straight out the back of the cabinet and into the outlet that's behind it. I used a 1 1/4-inch spade drill bit to drill a hole through the thin particleboard in the back of the cabinet. It is the perfect size for a plug!

I did the same thing with my computer's cord, but used two holes - one for the cord to enter the cabinet, and one for it to exit + plug in. The excess cord and the power box live in the cabinet, hidden behind the printer.
Minimal unsightly cords for the win!
Organizing a Desk Without Drawers
I knew the one failing of a desk with door cabinets would be no drawers. But now that I've been using this desk for a few weeks, I'm surprised by how much this has not bothered me. I've found that as long as popular items can be reached easily, doors are not a hinderance.
Baskets are the name of the game for desk cabinet organization. Anything you can group together, just put in a basket. It's almost like a drawer - just with the one extra step of opening a door to get to it.
Baskets also are nice because these shelves are DEEP, and a lot of things I needed to store here are on the smaller side. Rather than digging through individual items in the back of the cabinet, I can just grab a basket, take it to a regular height, and look through it.
Trays work well for things you need to be able to reach right in and grab, like pens or cords. I keep mine on the highest right hand shelf so I can access it while at the computer.
At some point, I will probably get a desktop organizer for things I almost always have out. I like that here, you can put it away in the cabinet if you don't want it out.

And with that, the desk is DONE! The reveal of the whole room (!!!) is coming later this week! Here's a recap of what's been on the blog so far:
Week 1: Plans for the Bonus RoomWeek 2: Contrast TrimWeek 3:Wrapping ClosetWeek 4: DIY Hanging Wrapping Paper Storage SolutionWeek 5: IKEA Desk HackWeek 6: Countertop for DeskWeek 7: Desk Organization (you are here!)- Week 8: Reveal!


Leave a Reply